Hailo-Powered Car Park Management with ThingsBoard
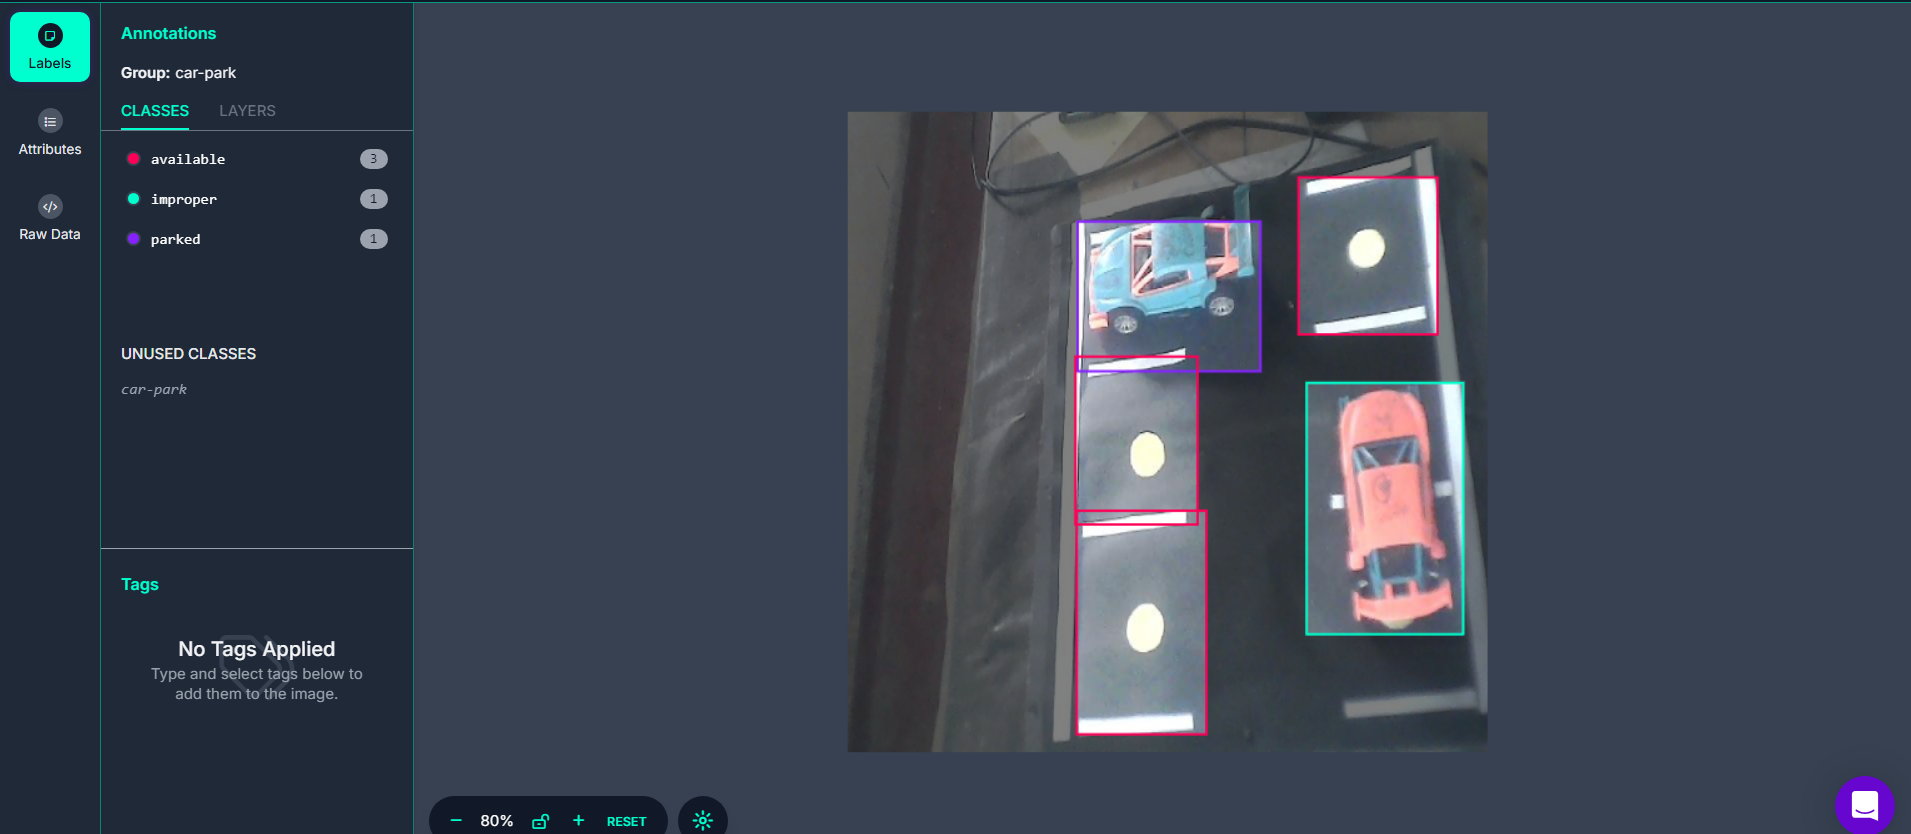
This project delivers a custom model for detecting parking possibilities in a car park. The system identifies three classes: available slots, parked slots, and improper parking.
The model was trained using the YOLOv8n framework and deployed on a Raspberry Pi with a Hailo-8L accelerator. The modified code enables real-time parking slot counting and sends MQTT messages to the ThingsBoard IoT platform.
ThingsBoard provides an intuitive interface for data visualization and analysis, making it easy to monitor parking conditions and optimize management.
Step 1: Data Collection and Labeling
We created a small prototype of a car park to demonstrate the working phenomenon. Using a webcam connected to a Raspberry Pi, we collected images of the parking area. These images were then uploaded to a Roboflow repository for further processing.
The images were labeled into three distinct classes:
- Available
- Parked
- Improper
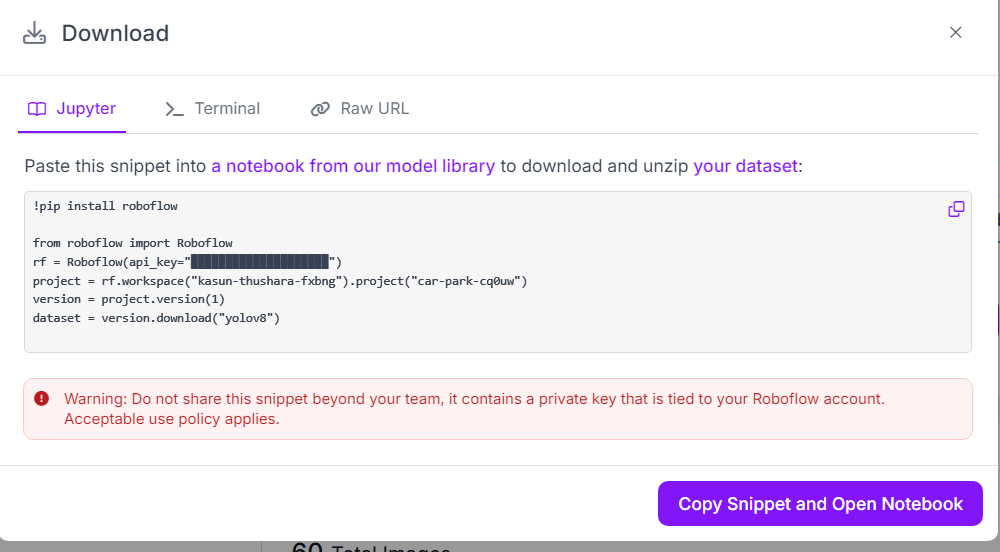
You can view the project here: Car Park - Roboflow Repository
Step 2: Model Training
We trained a YOLOv8n model using a custom dataset. Roboflow provides a downloadable link for the dataset, which can be used to train the model with YOLOv8n.
After training, the model must be exported to the ONNX format for deployment.
Detailed instructions on model labeling and training can be found in Chapter 5
How to convert ONNX model to HEF
Step 3: Deploy the Model
On the Raspberry Pi, after installing Hailo tools, you can test if the detection is working correctly. For MQTT connection, ensure you install the required dependencies in the same virtual environment:
sudo apt update
sudo apt install -y mosquitto mosquitto-clients
pip install paho-mqtt
We modified the detection_pipeline.py script and renamed it as park_object_detection.py. Below is the modified code:
import gi
gi.require_version('Gst', '1.0')
from gi.repository import Gst, GLib
import os
import numpy as np
import cv2
import hailo
import paho.mqtt.client as mqtt
import json
from hailo_rpi_common import (
    get_caps_from_pad,
    get_numpy_from_buffer,
    app_callback_class,
)
from detection_pipeline import GStreamerDetectionApp

# -----------------------------------------------------------------------------------------------
# User-defined class to be used in the callback function
# -----------------------------------------------------------------------------------------------
class user_app_callback_class(app_callback_class):
    def __init__(self):
        super().__init__()
        self.detection_counts = {
            "available": 0,
            "parked": 0,
            "improper": 0
        }

    def reset_counts(self):
        self.detection_counts = {key: 0 for key in self.detection_counts}

# -----------------------------------------------------------------------------------------------
# MQTT Setup
# -----------------------------------------------------------------------------------------------
BROKER = "192.168.8.195"  # ThingsBoard Host-Name
CLIENT_ID = "Car_Park" # The Client ID which you give in the Thingsboard End
PORT = 1883
TOPIC = "v1/devices/me/telemetry"  # Topic For Sending data to ThingsBoard

mqtt_client = mqtt.Client(CLIENT_ID)

def setup_mqtt():
    mqtt_client.connect(BROKER, PORT, 60)
    mqtt_client.loop_start()

def publish_counts(detection_counts):
    payload = json.dumps(detection_counts)  # Convert counts to JSON format
    mqtt_client.publish(TOPIC, payload, qos=1)
    print(f"Published: {payload} to topic {TOPIC}")

# -----------------------------------------------------------------------------------------------
# User-defined callback function
# -----------------------------------------------------------------------------------------------
def app_callback(pad, info, user_data):
    buffer = info.get_buffer()
    if buffer is None:
        return Gst.PadProbeReturn.OK

    user_data.reset_counts()
    roi = hailo.get_roi_from_buffer(buffer)
    detections = roi.get_objects_typed(hailo.HAILO_DETECTION)

    for detection in detections:
        label = detection.get_label()
        if label in user_data.detection_counts:
            user_data.detection_counts[label] += 1

    publish_counts(user_data.detection_counts)
    print(f"Detection Counts: {user_data.detection_counts}")

    return Gst.PadProbeReturn.OK

# -----------------------------------------------------------------------------------------------
# Main
# -----------------------------------------------------------------------------------------------
if __name__ == "__main__":
    setup_mqtt()
    user_data = user_app_callback_class()
    app = GStreamerDetectionApp(app_callback, user_data)

    try:
        app.run()
    except KeyboardInterrupt:
        print("Shutting down...")
    finally:
        mqtt_client.loop_stop()
        mqtt_client.disconnect()
Step 4: Install ThingsBoard and Add a Device
ThingsBoard is an open-source IoT platform designed for device management, data collection, processing, and visualization. It supports various communication protocols such as MQTT, CoAP, and HTTP, making it versatile for integrating IoT devices and systems. The platform enables users to create interactive dashboards, monitor devices in real-time, and analyze data through advanced visualization tools. With its rule engine, ThingsBoard automates workflows and event processing, simplifying the implementation of IoT use cases across industries. Its scalability and flexibility make it suitable for projects of any size, from small prototypes to large-scale deployments.Additionally, you can use their cloud solution for easier deployment and management.
We have provided instructions on installing the ThingsBoard Community Edition and the Edge version. You can refer to this wiki lesson for guidance.
Step 5: Provision a Device
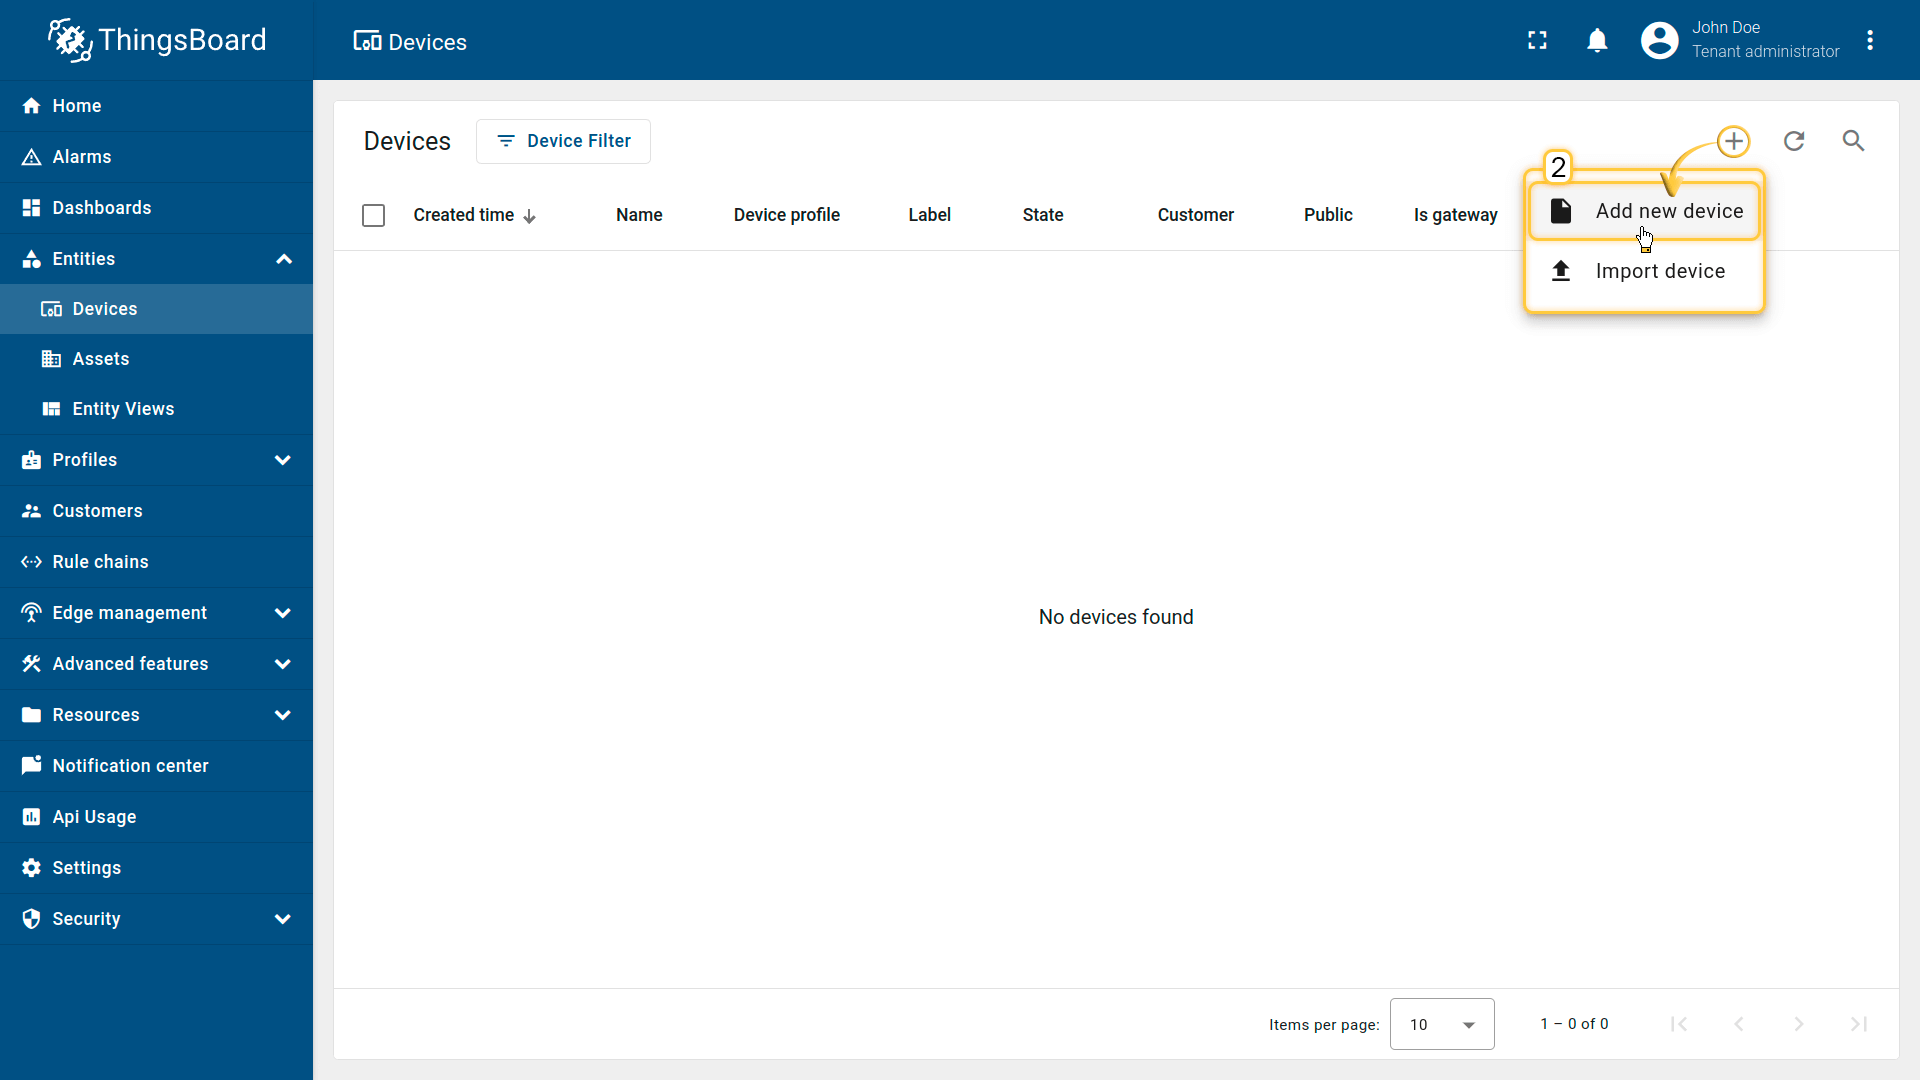
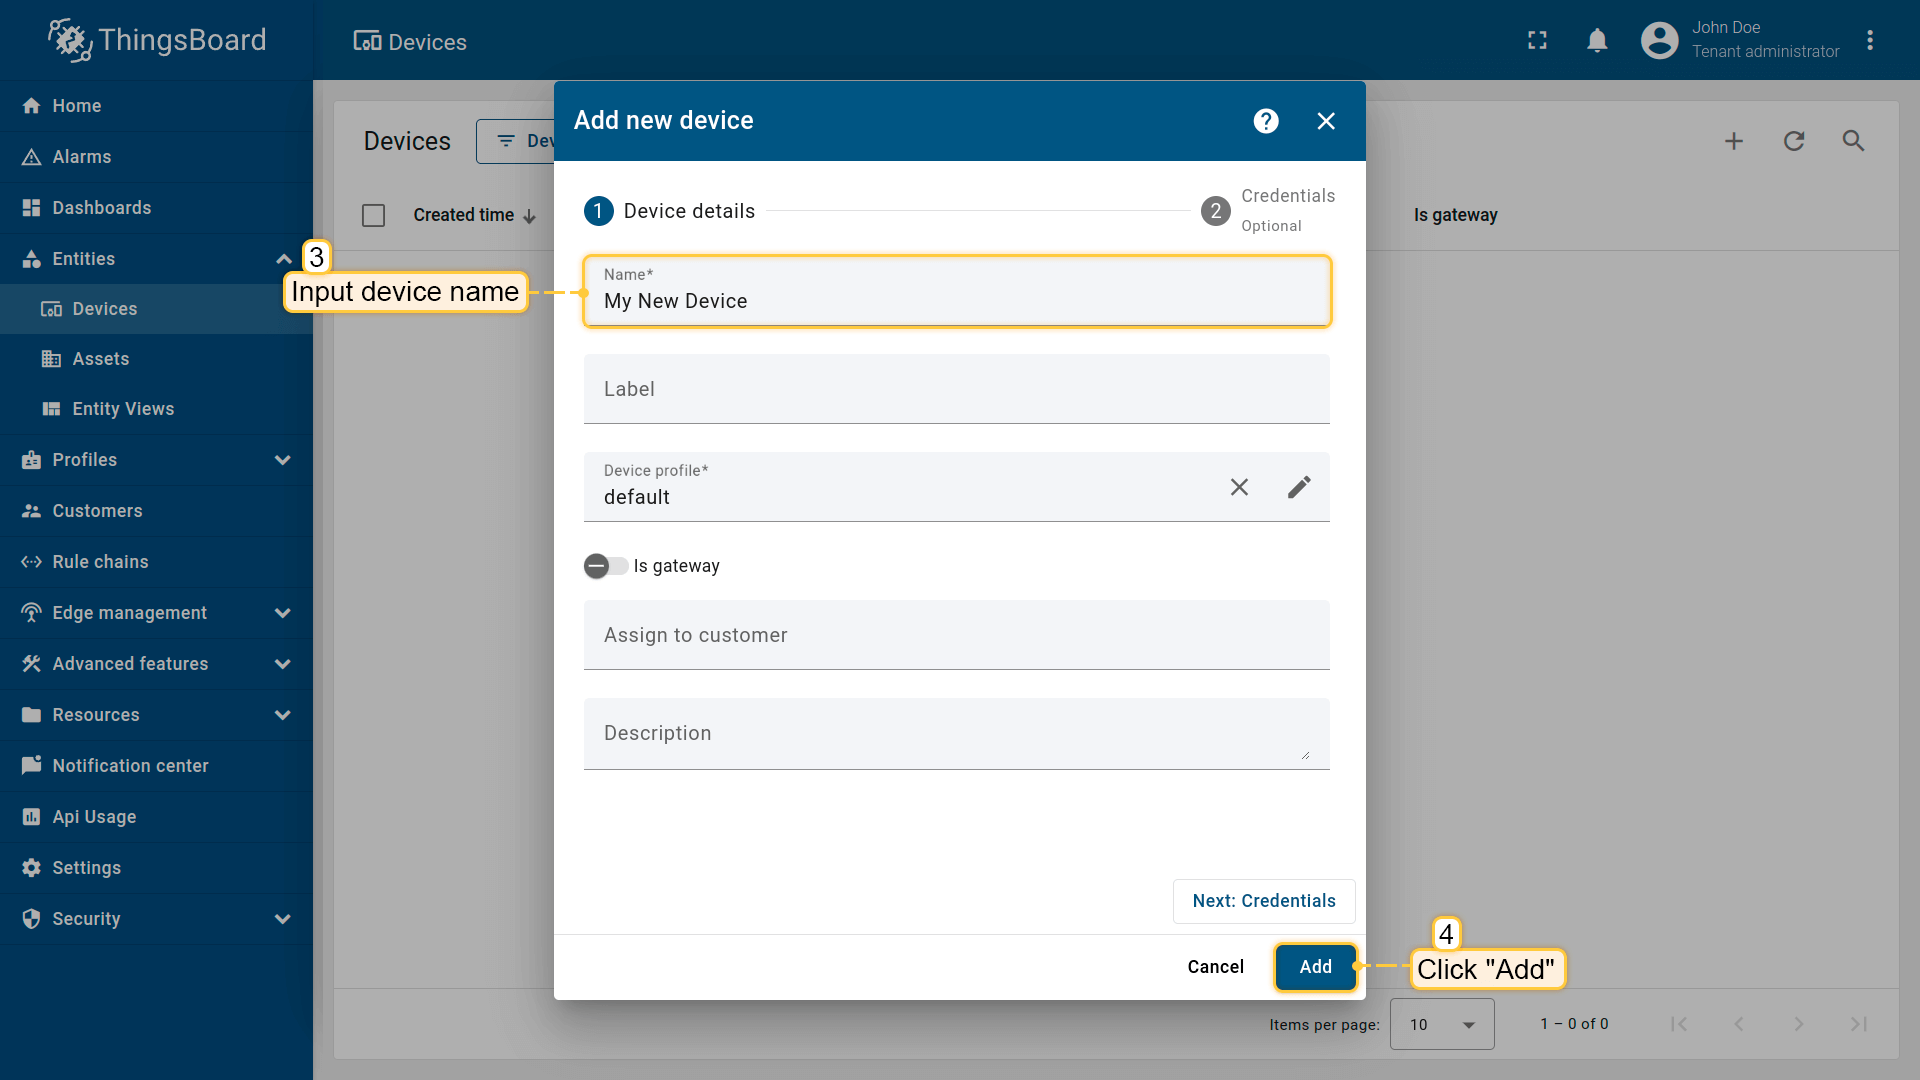
- Navigate to the Devices page under the Entities section.
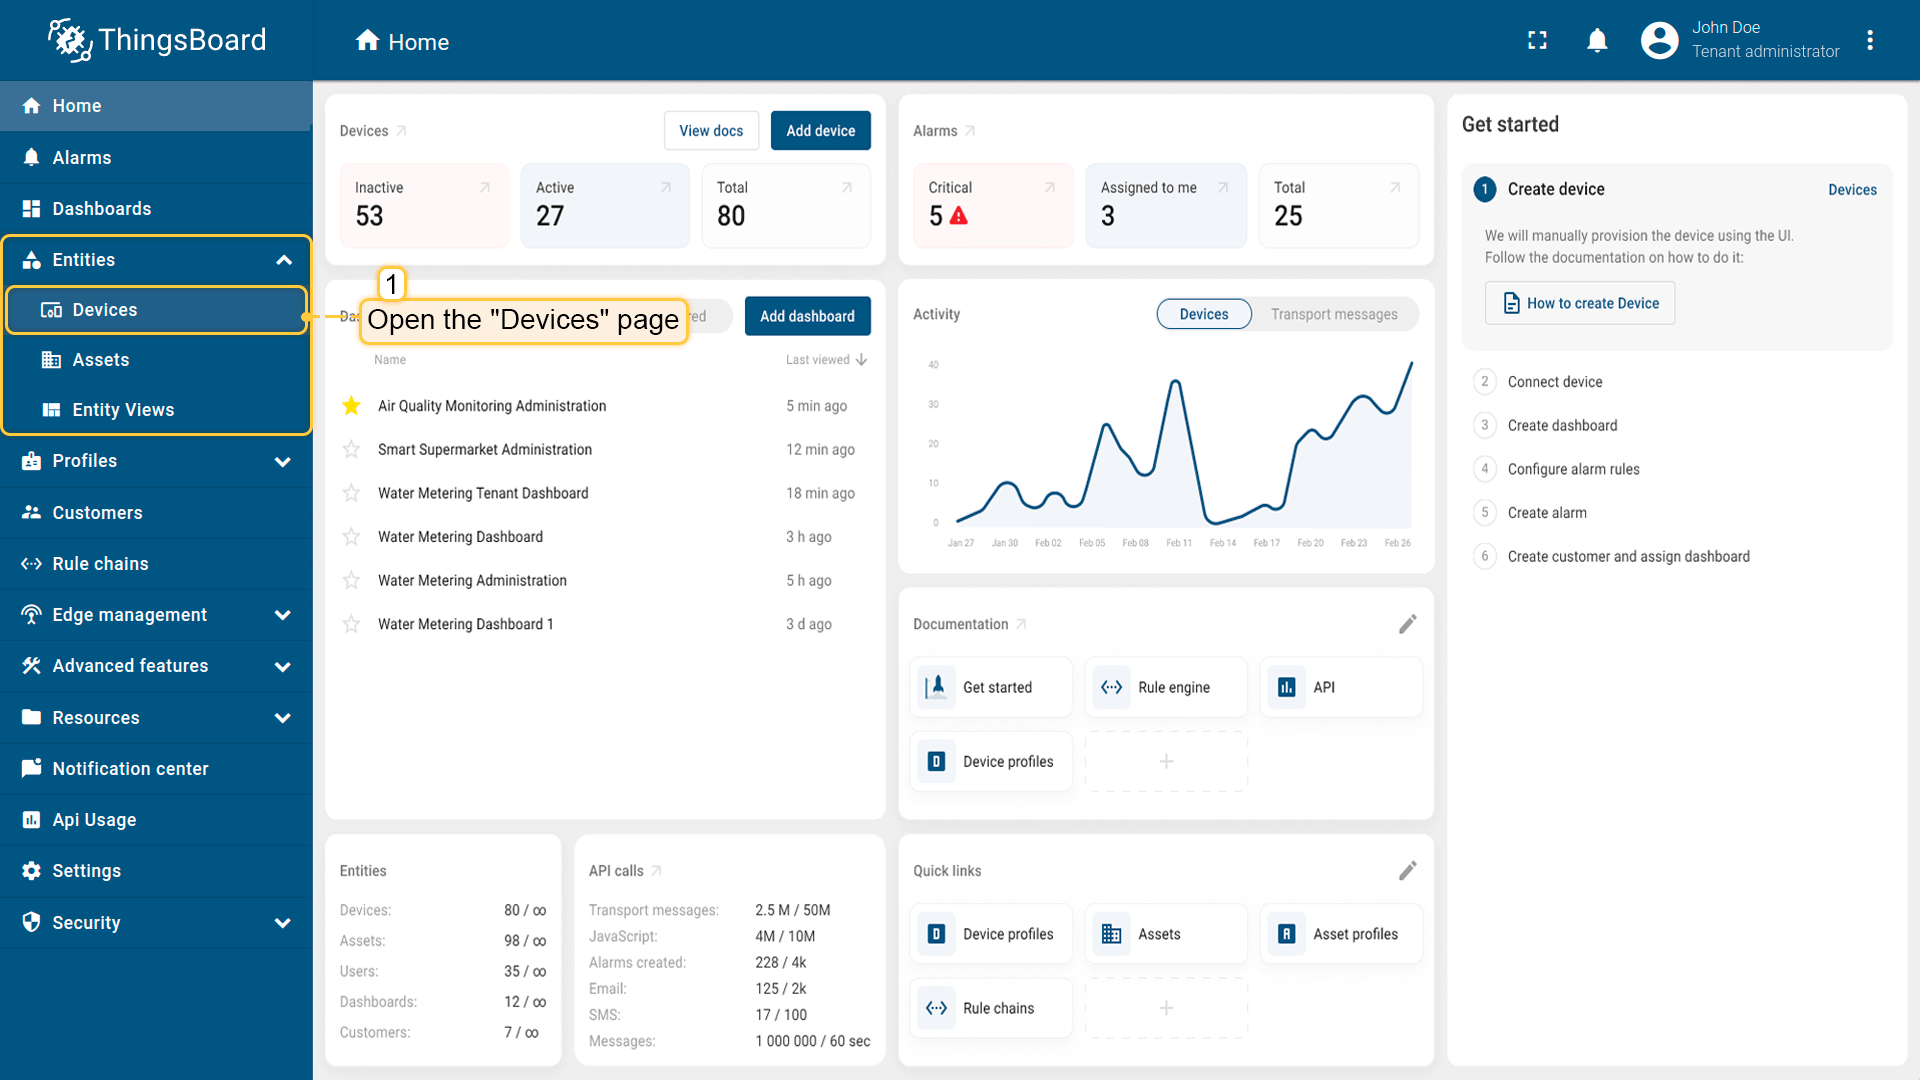
- Click the '+' icon in the top right corner of the table and select 'Add new device' from the drop-down menu.
-
Enter the device name, Client ID, Password, and Username. Since this is a demo, we have not added a username or password when creating the device.
-
Click Add.
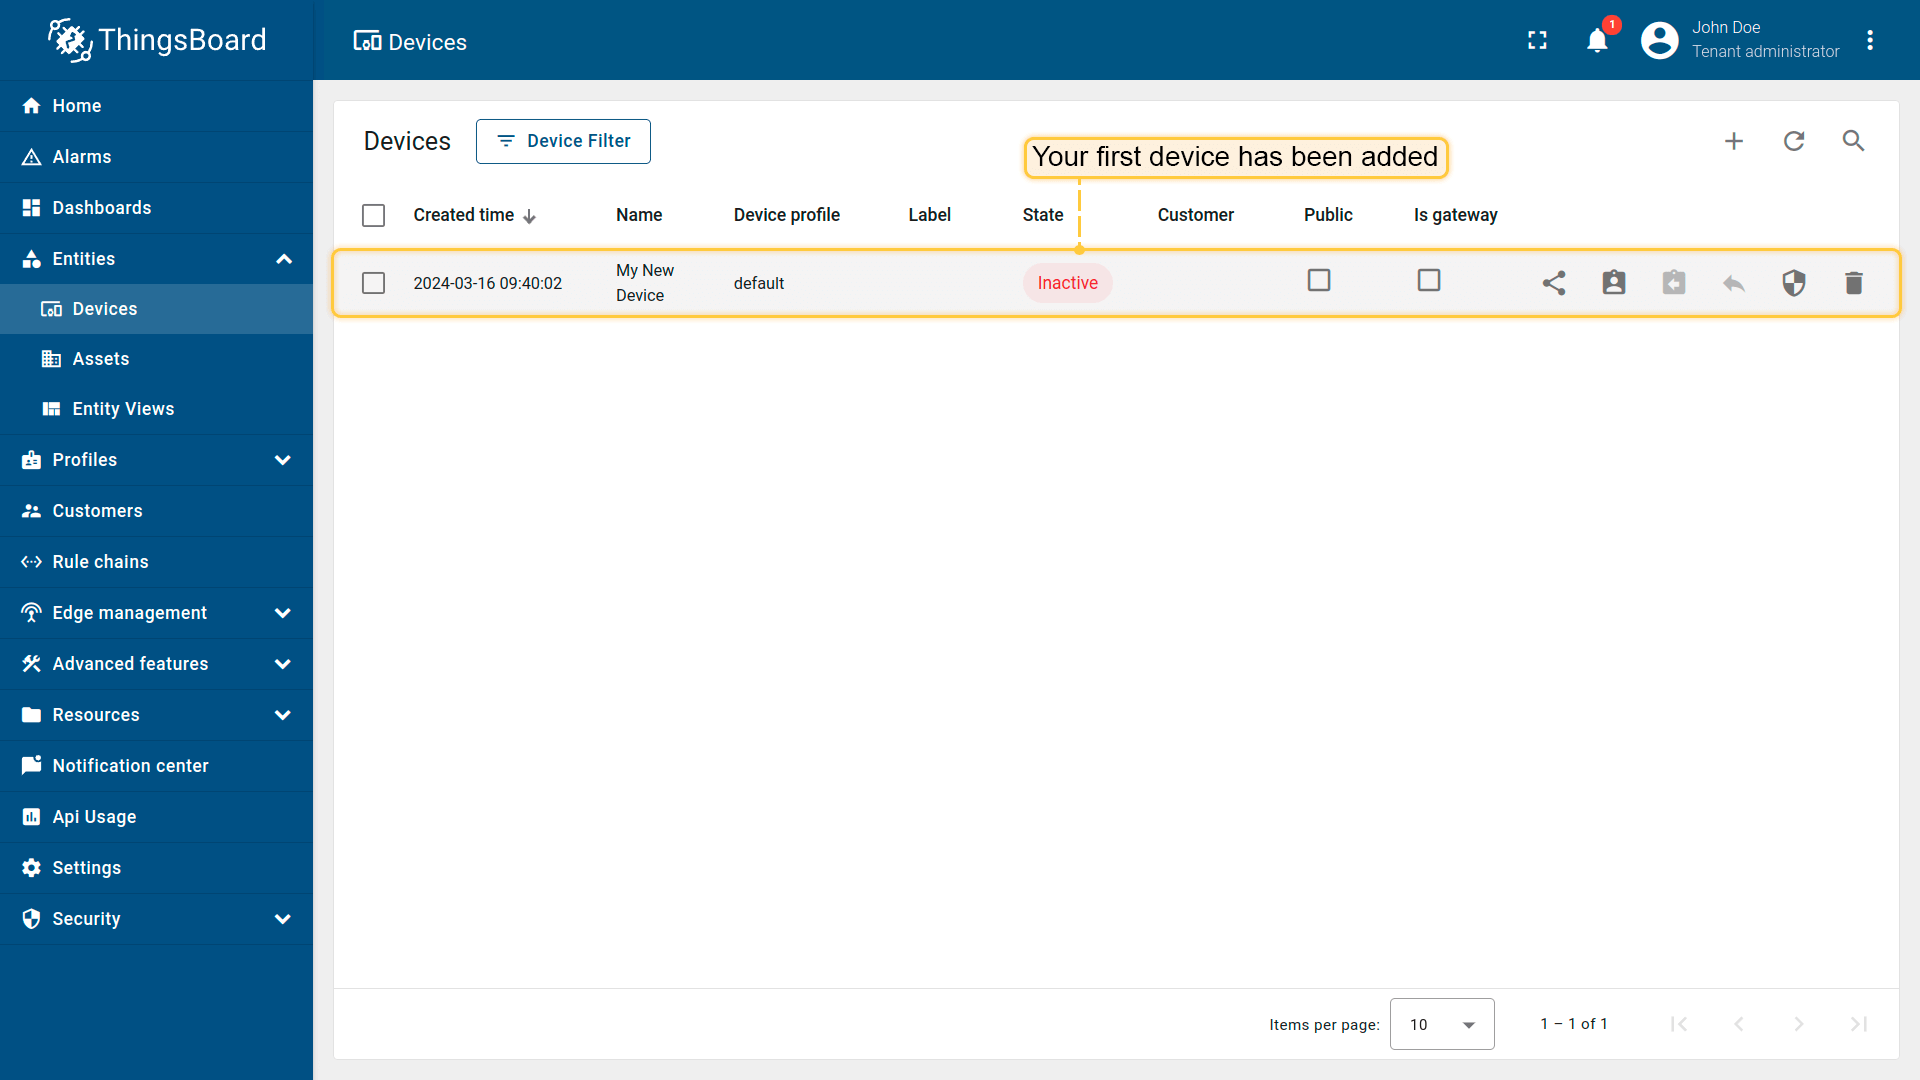
- As you add more devices, they will appear at the top of the table. The table automatically sorts devices by creation time, with the newest ones listed first.
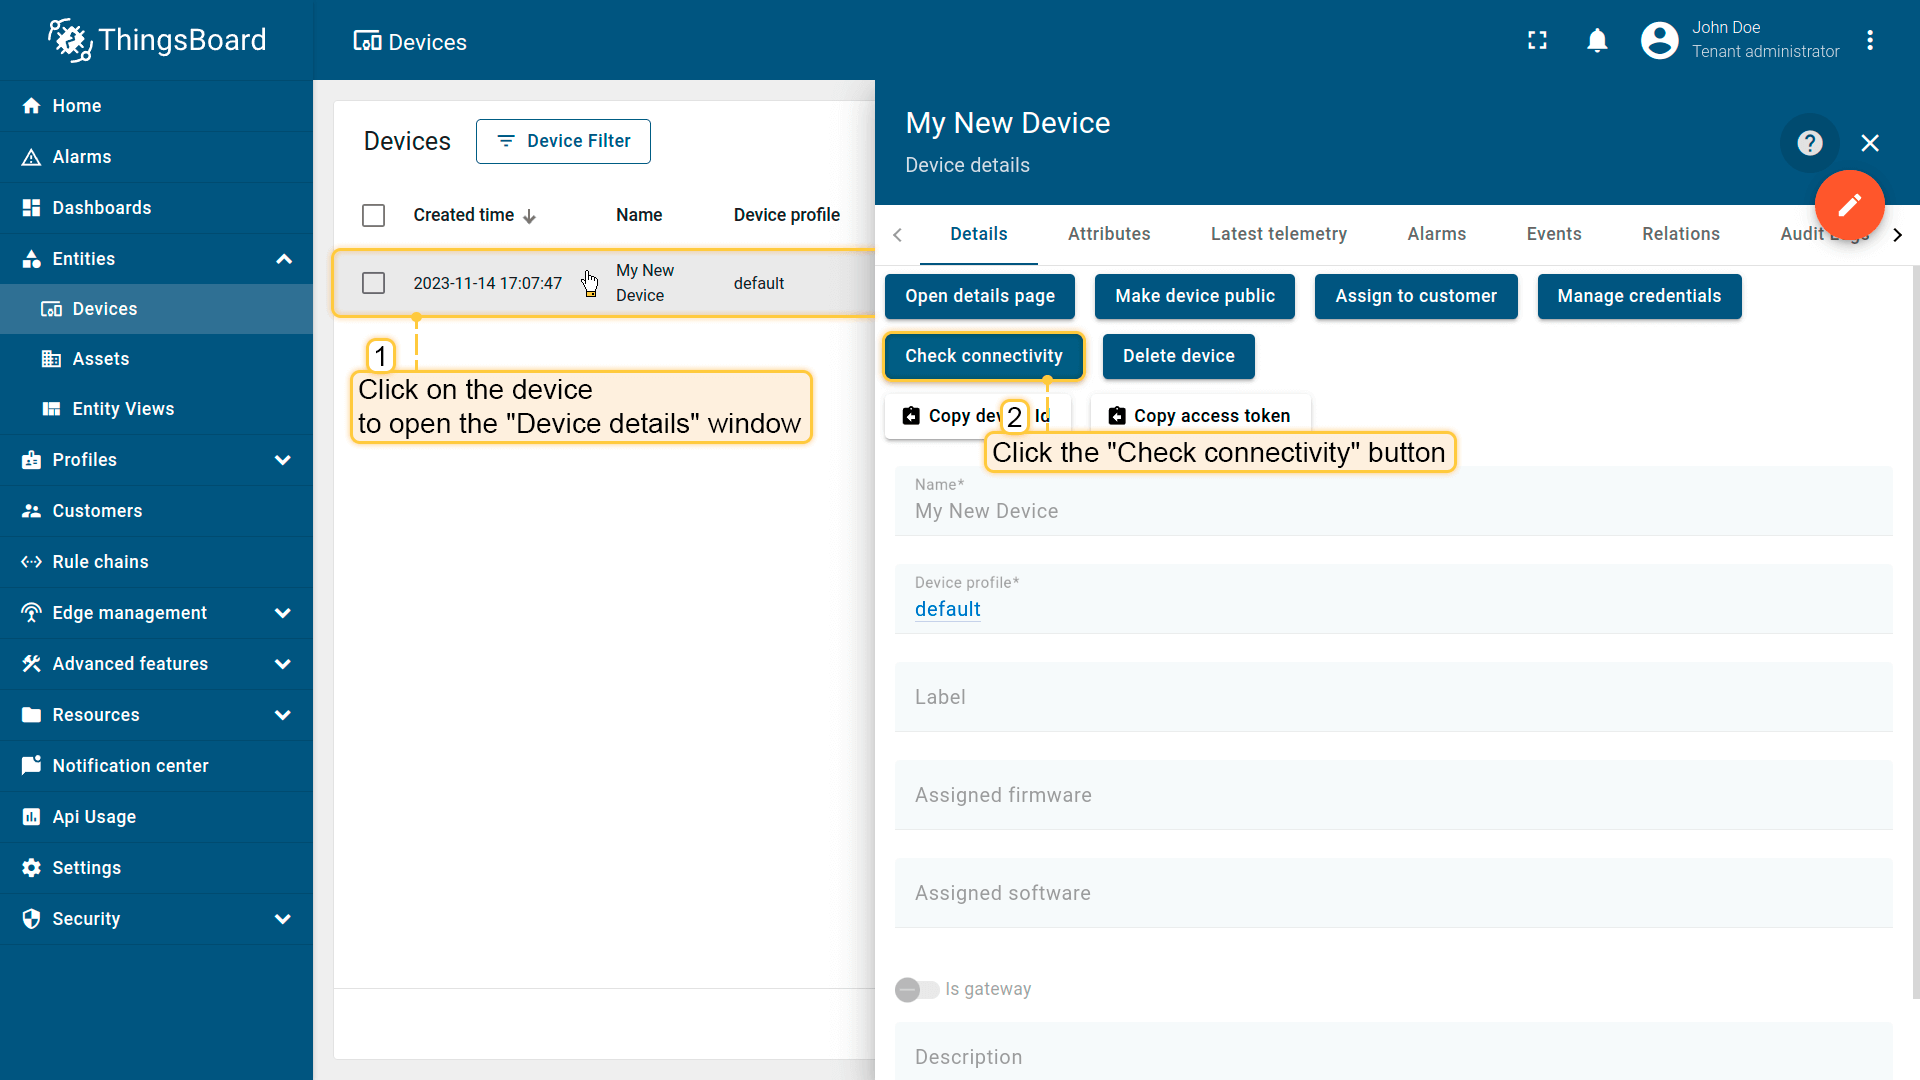
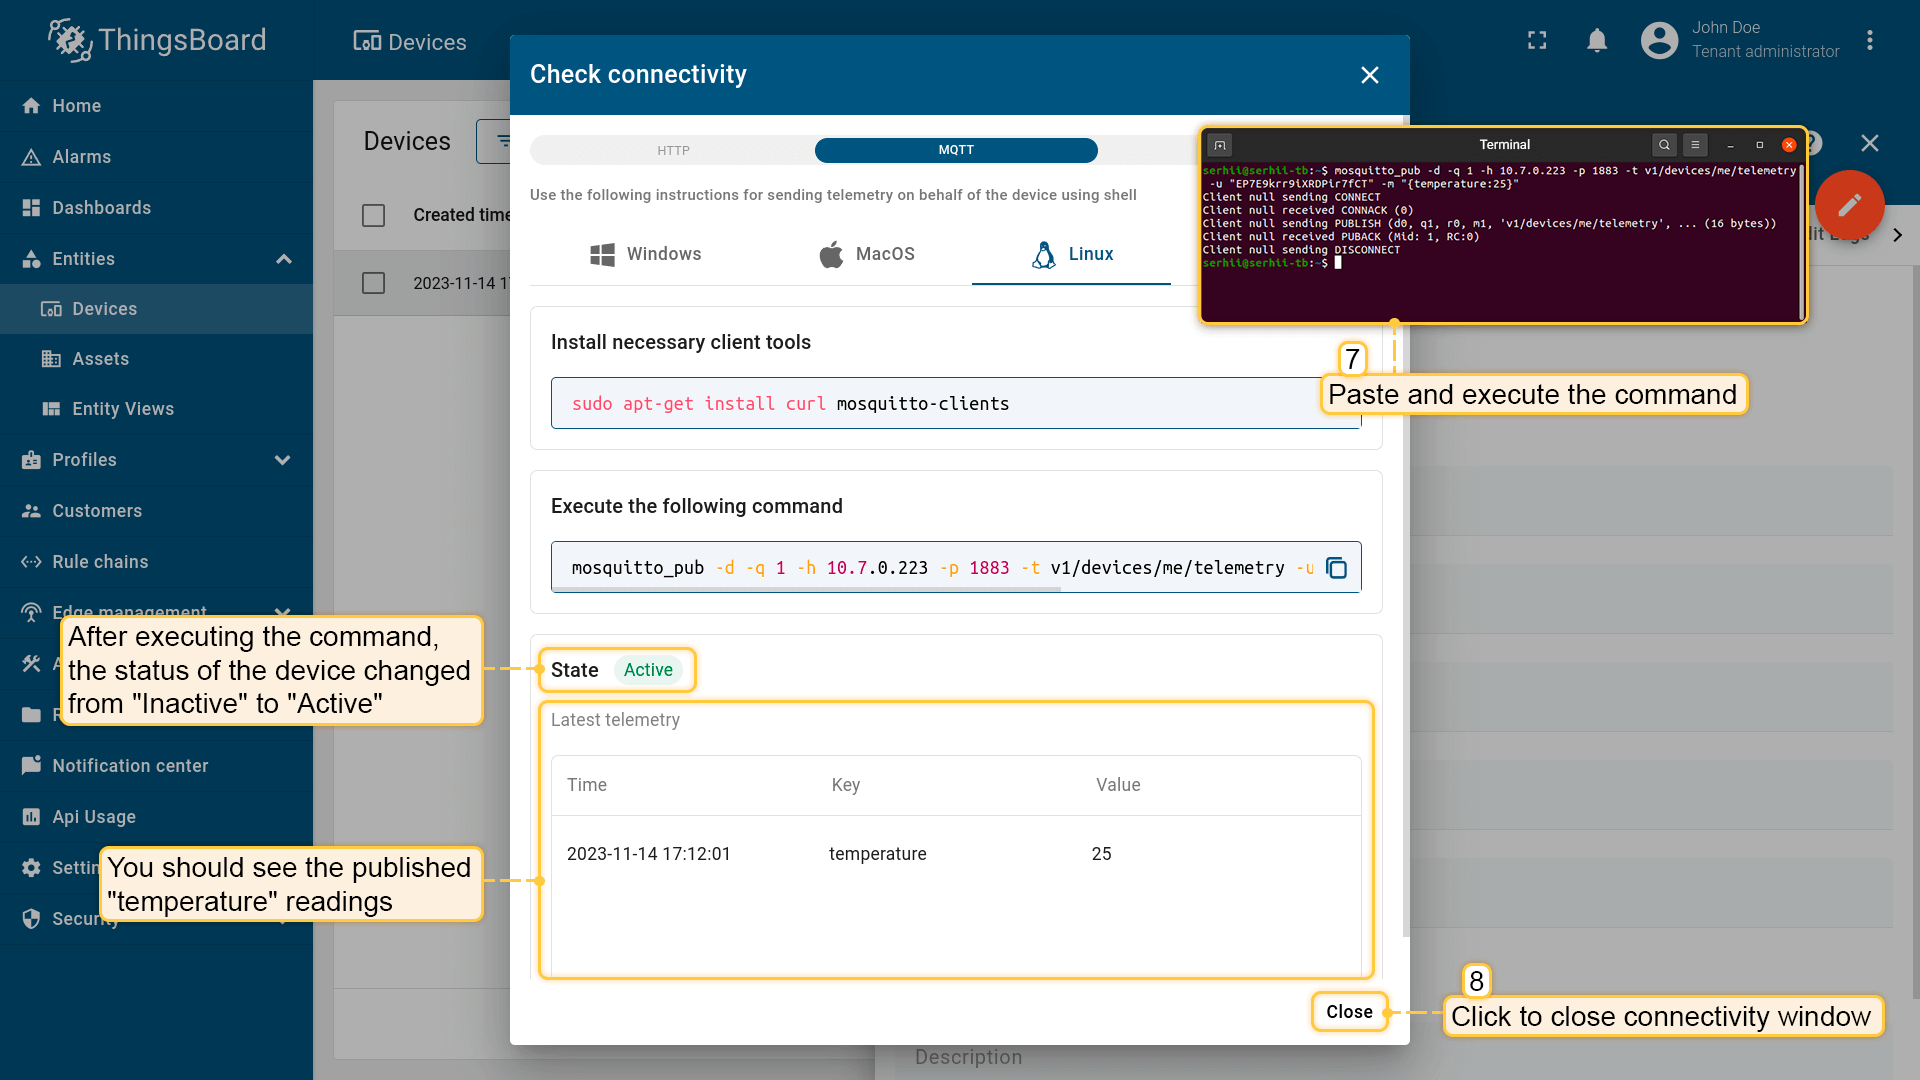
Step 6: Connect the Device
-
Click on your device and then click the Check connectivity button in the Device details window.
-
In the opened window, select the messaging protocol and your operating system:
- Operating System: Linux
- Protocol: MQTT
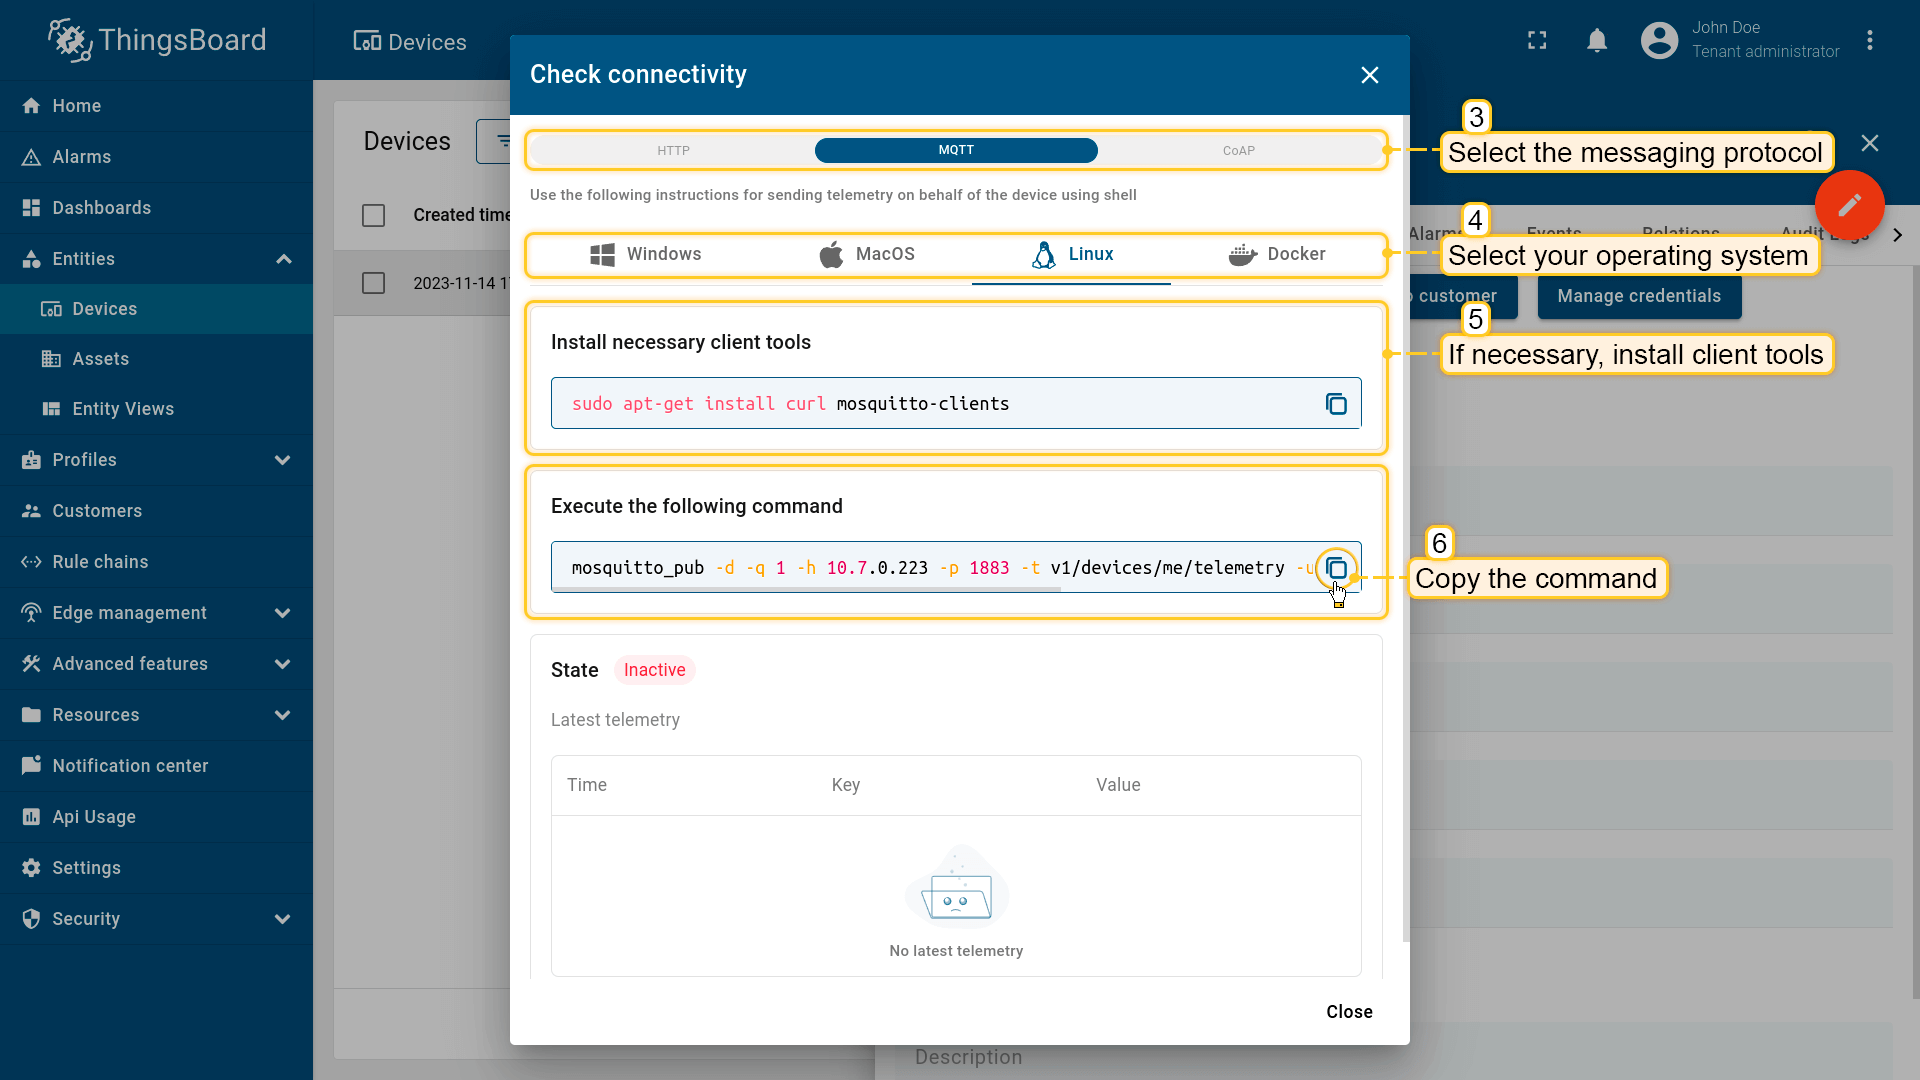
- Make sure to install the required client tools.
- Execute the copied command. Once the temperature readings are published successfully, the device state will change from "Inactive" to "Active". You will also see the published temperature readings.
Step 7: Run the Detection Code
cd hailo-rpi5-examples

source setup_env.sh

cd basic_pipelines

python park_object_detection.py --labels-json /home/pi/Desktop/hailo-custom/config.json --hef-path /home/pi/Desktop/hailo-custom/yolov8n_renamed_carpark.hef -i /dev/video0
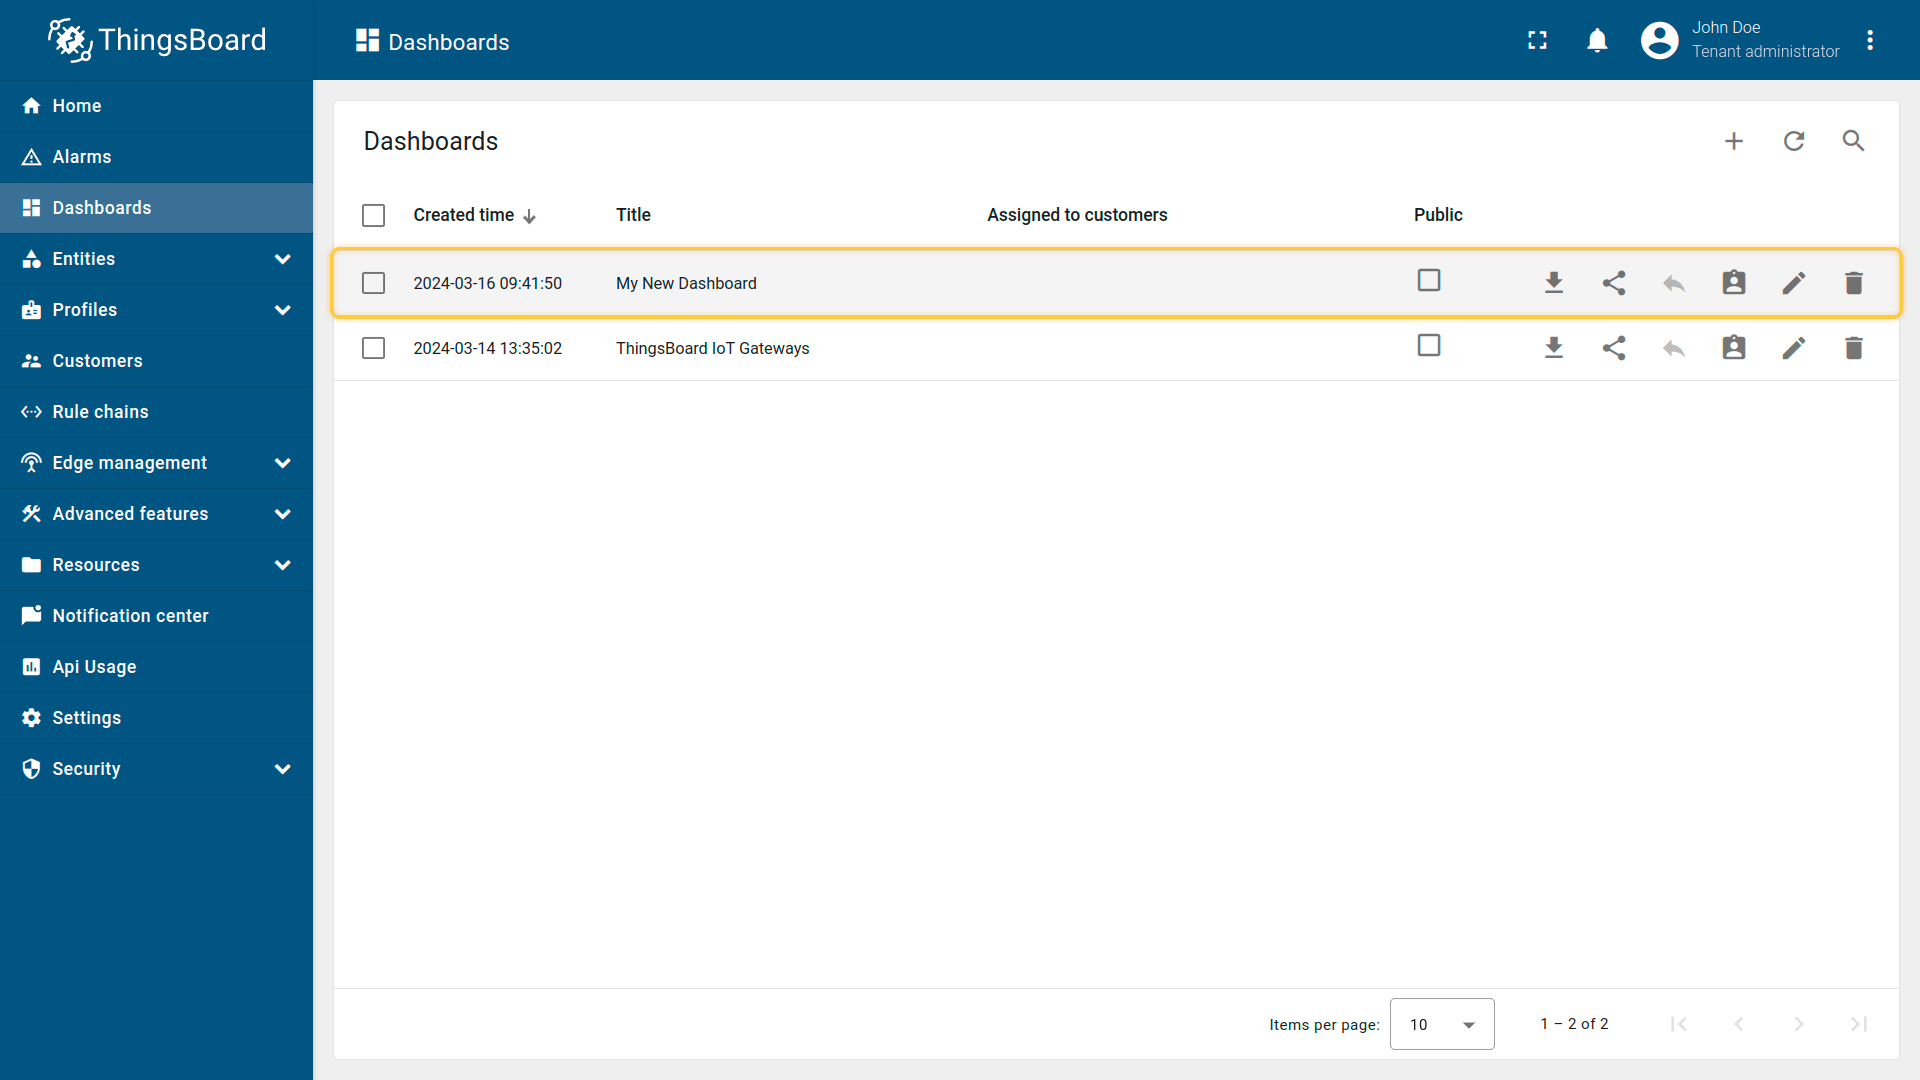
Step 8: Create a Dashboard
Create an Empty Dashboard
-
Navigate to the Dashboards page from the main menu on the left side of the screen.
-
Click the
+sign in the upper right corner of the screen and select 'Create new dashboard' from the drop-down menu.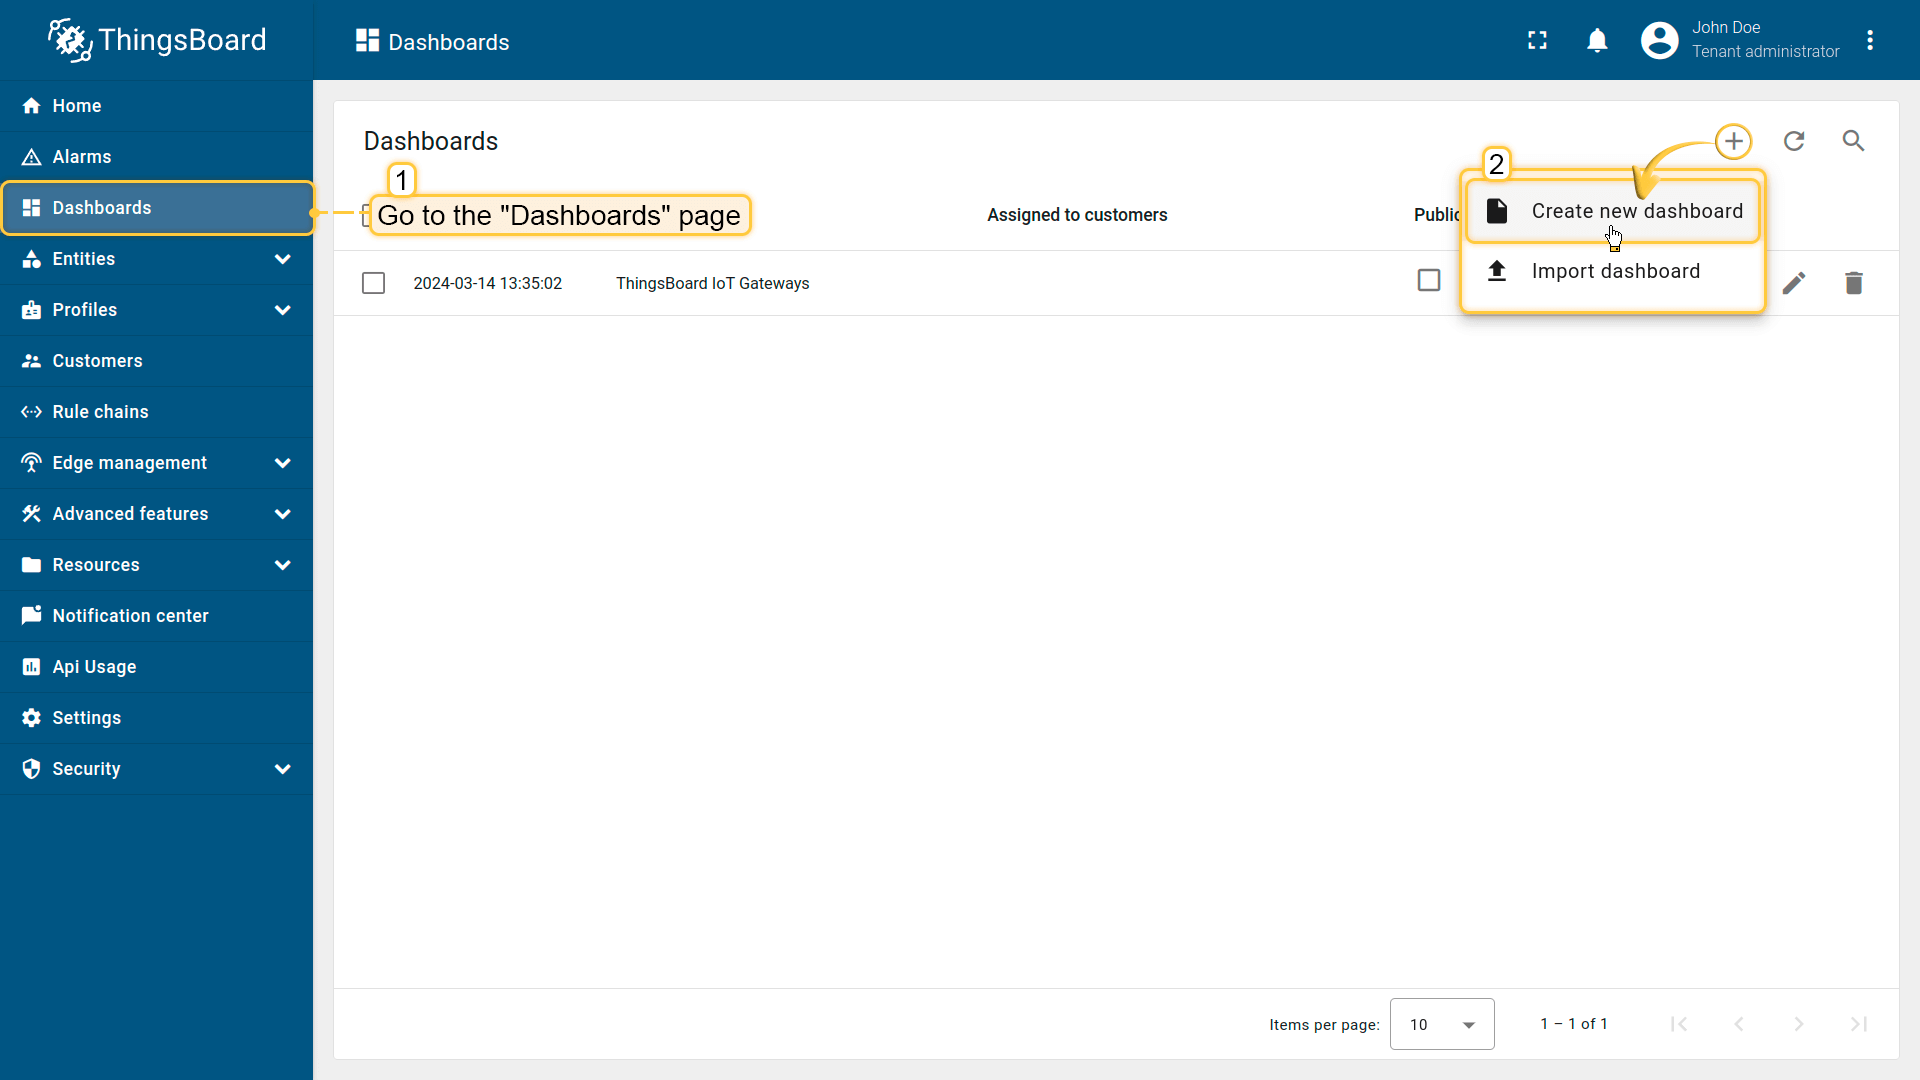
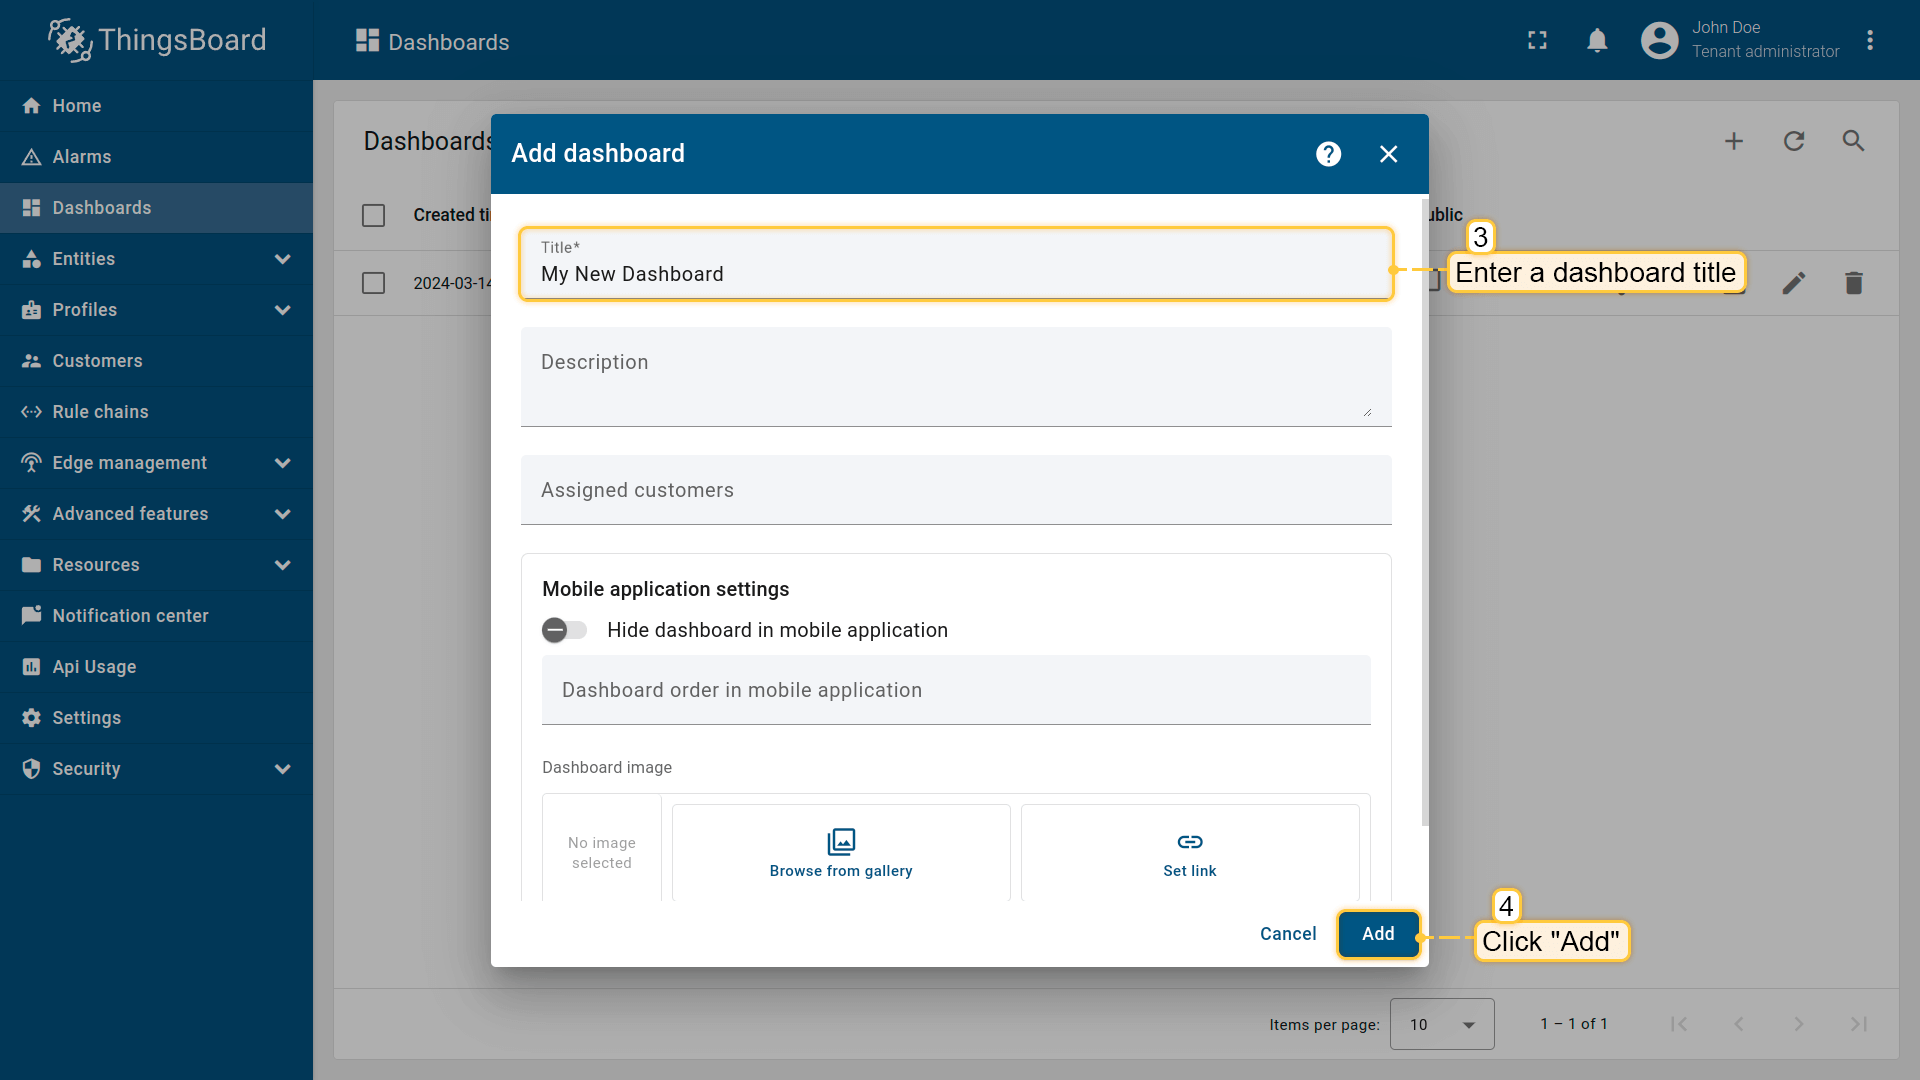
-
In the dialog box, enter a title for the dashboard (the description is optional).
-
Click Add.
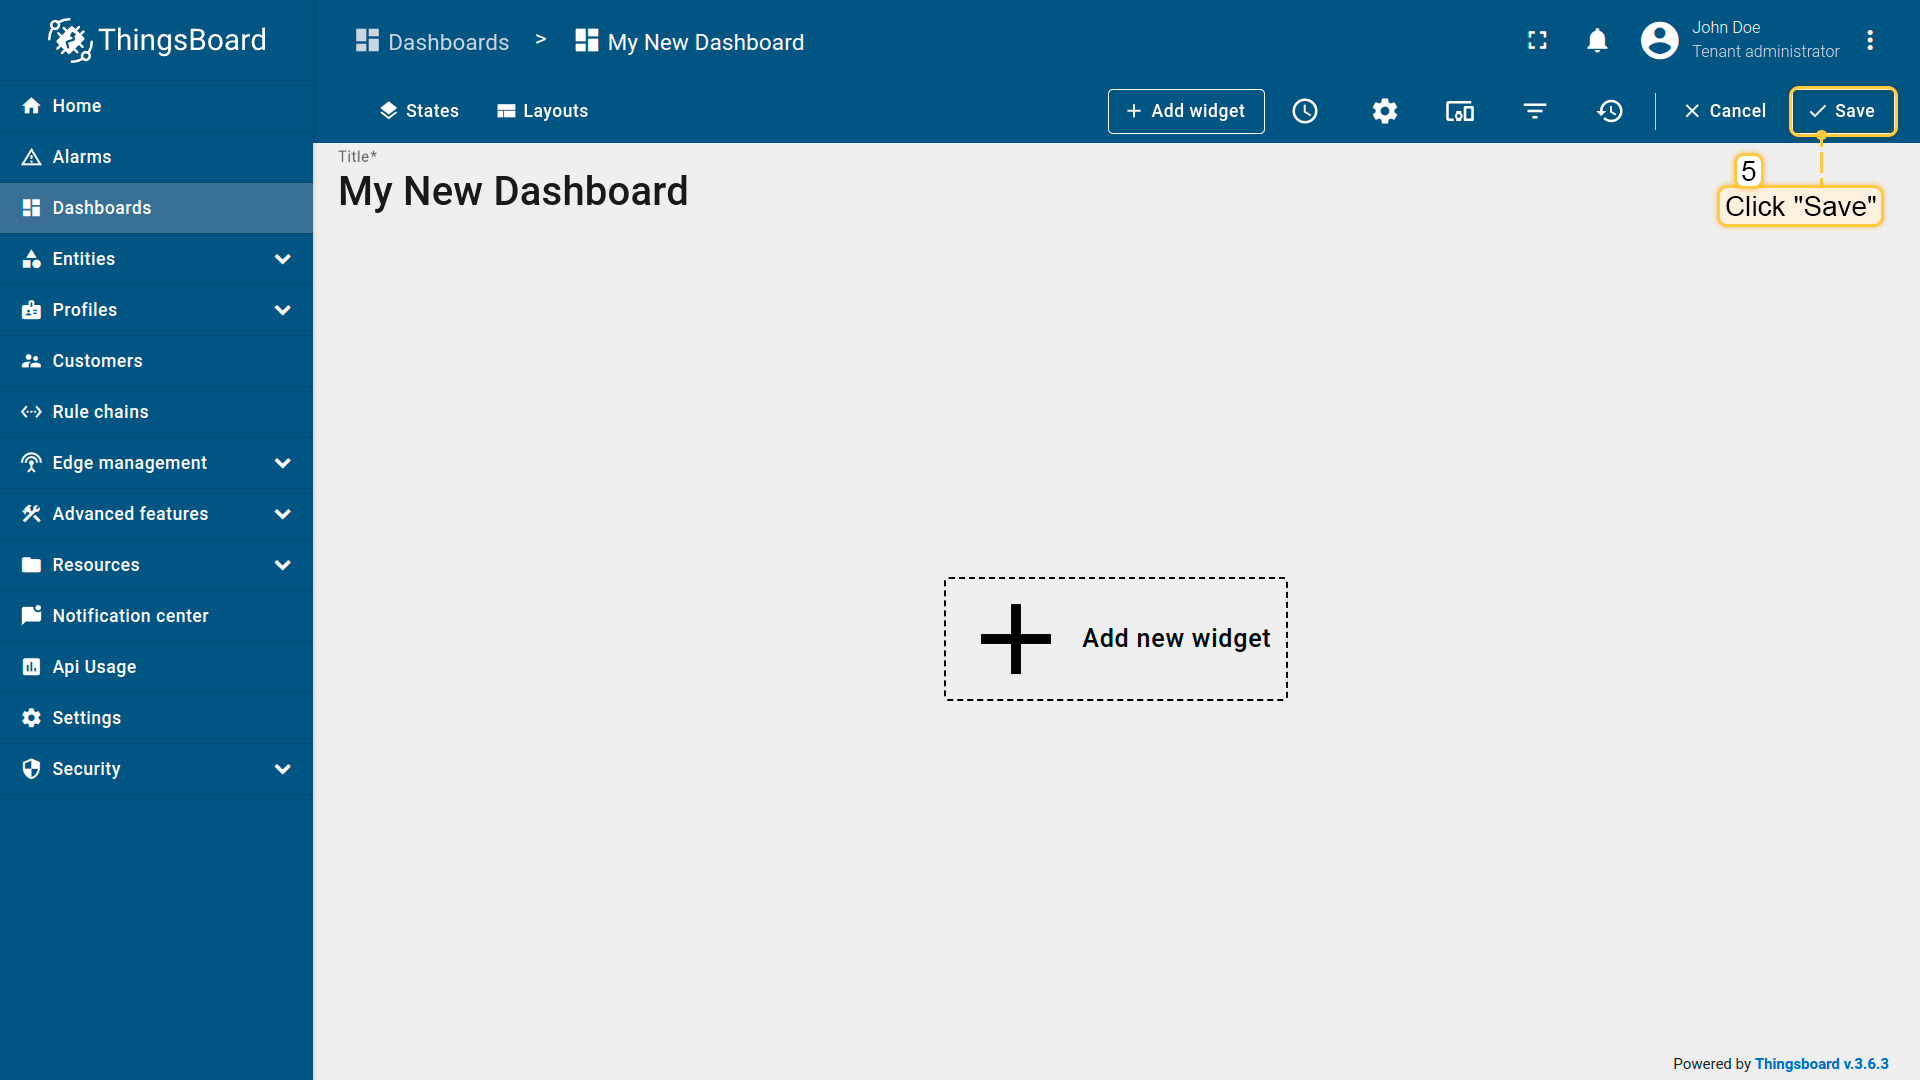
-
After creating the dashboard, it will open automatically, and you can start adding widgets.
-
To save the dashboard, click the Save button in the upper right corner.
-
Your first dashboard is now created. As you add more dashboards, they will appear at the top of the list, sorted by the creation timestamp.
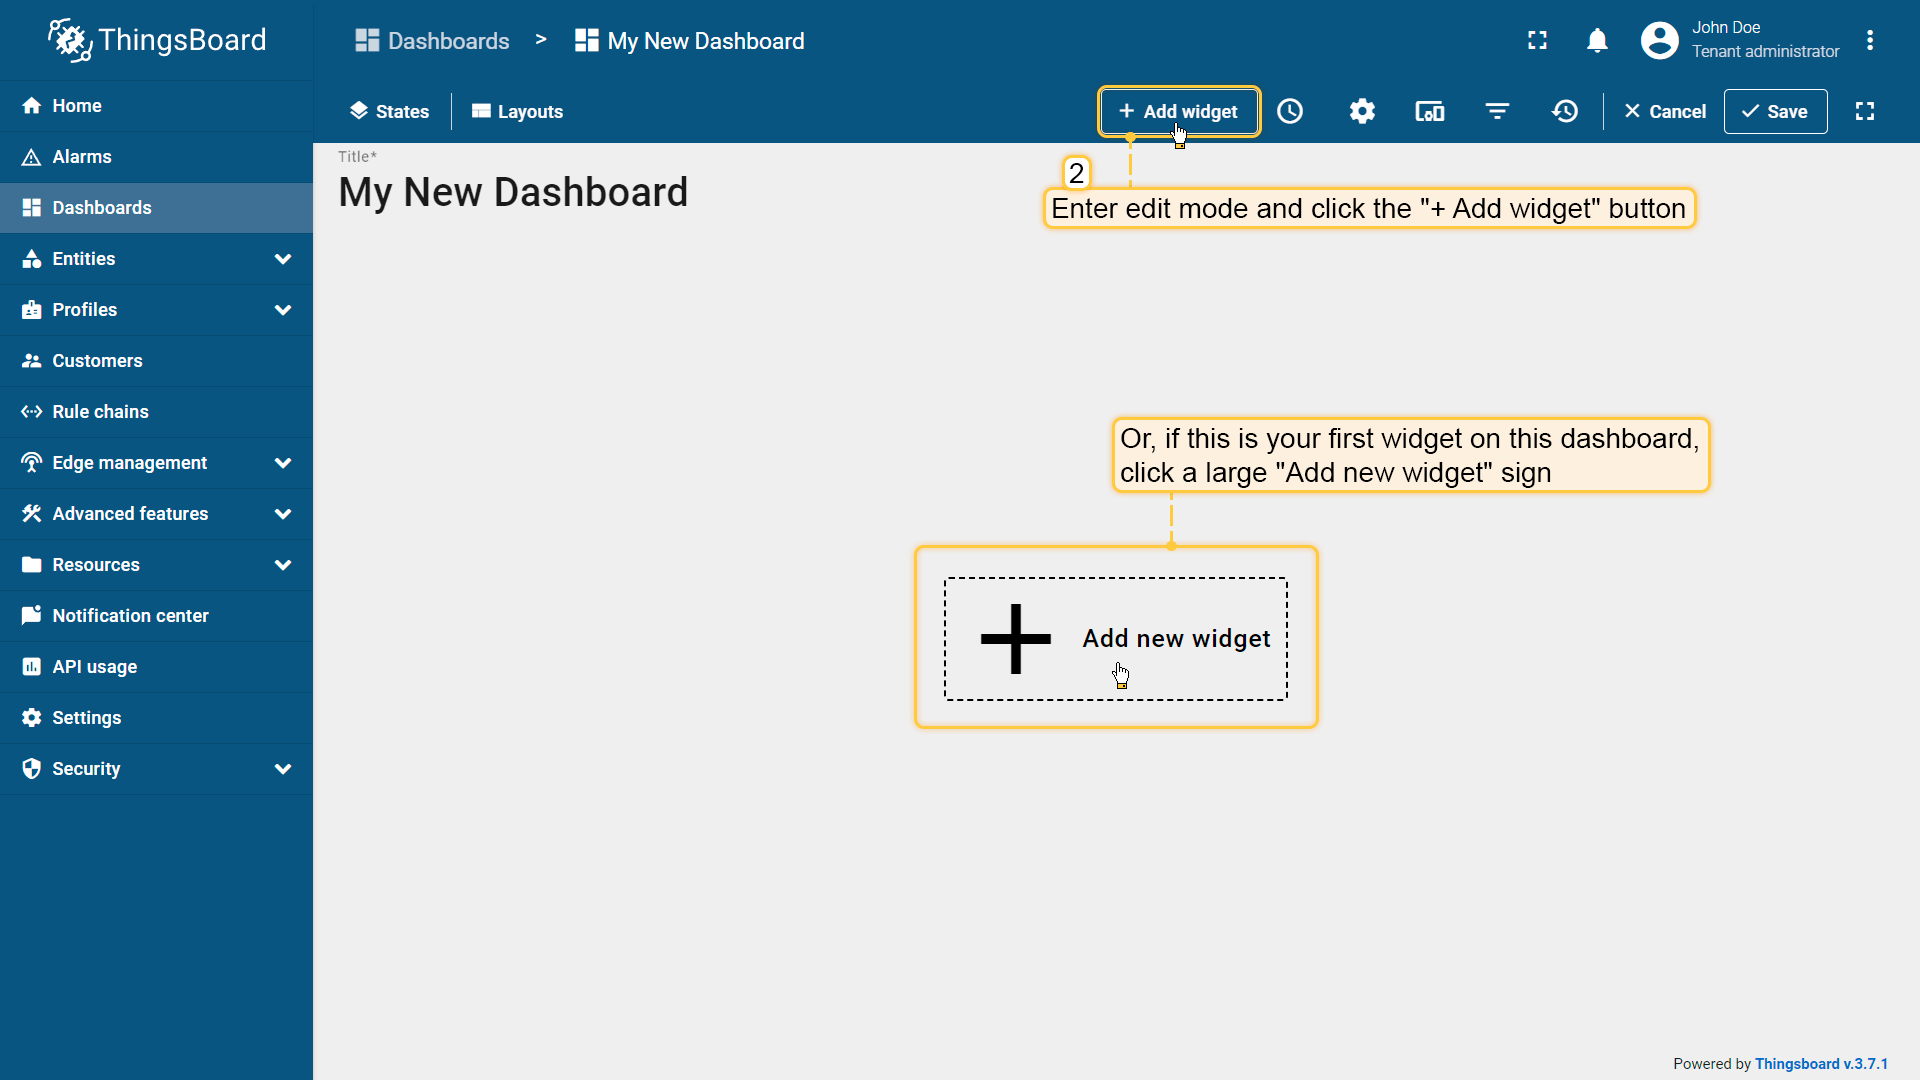
Add a Chart Widget
-
Enter edit mode and click the
Add new widgetbutton at the top of the screen.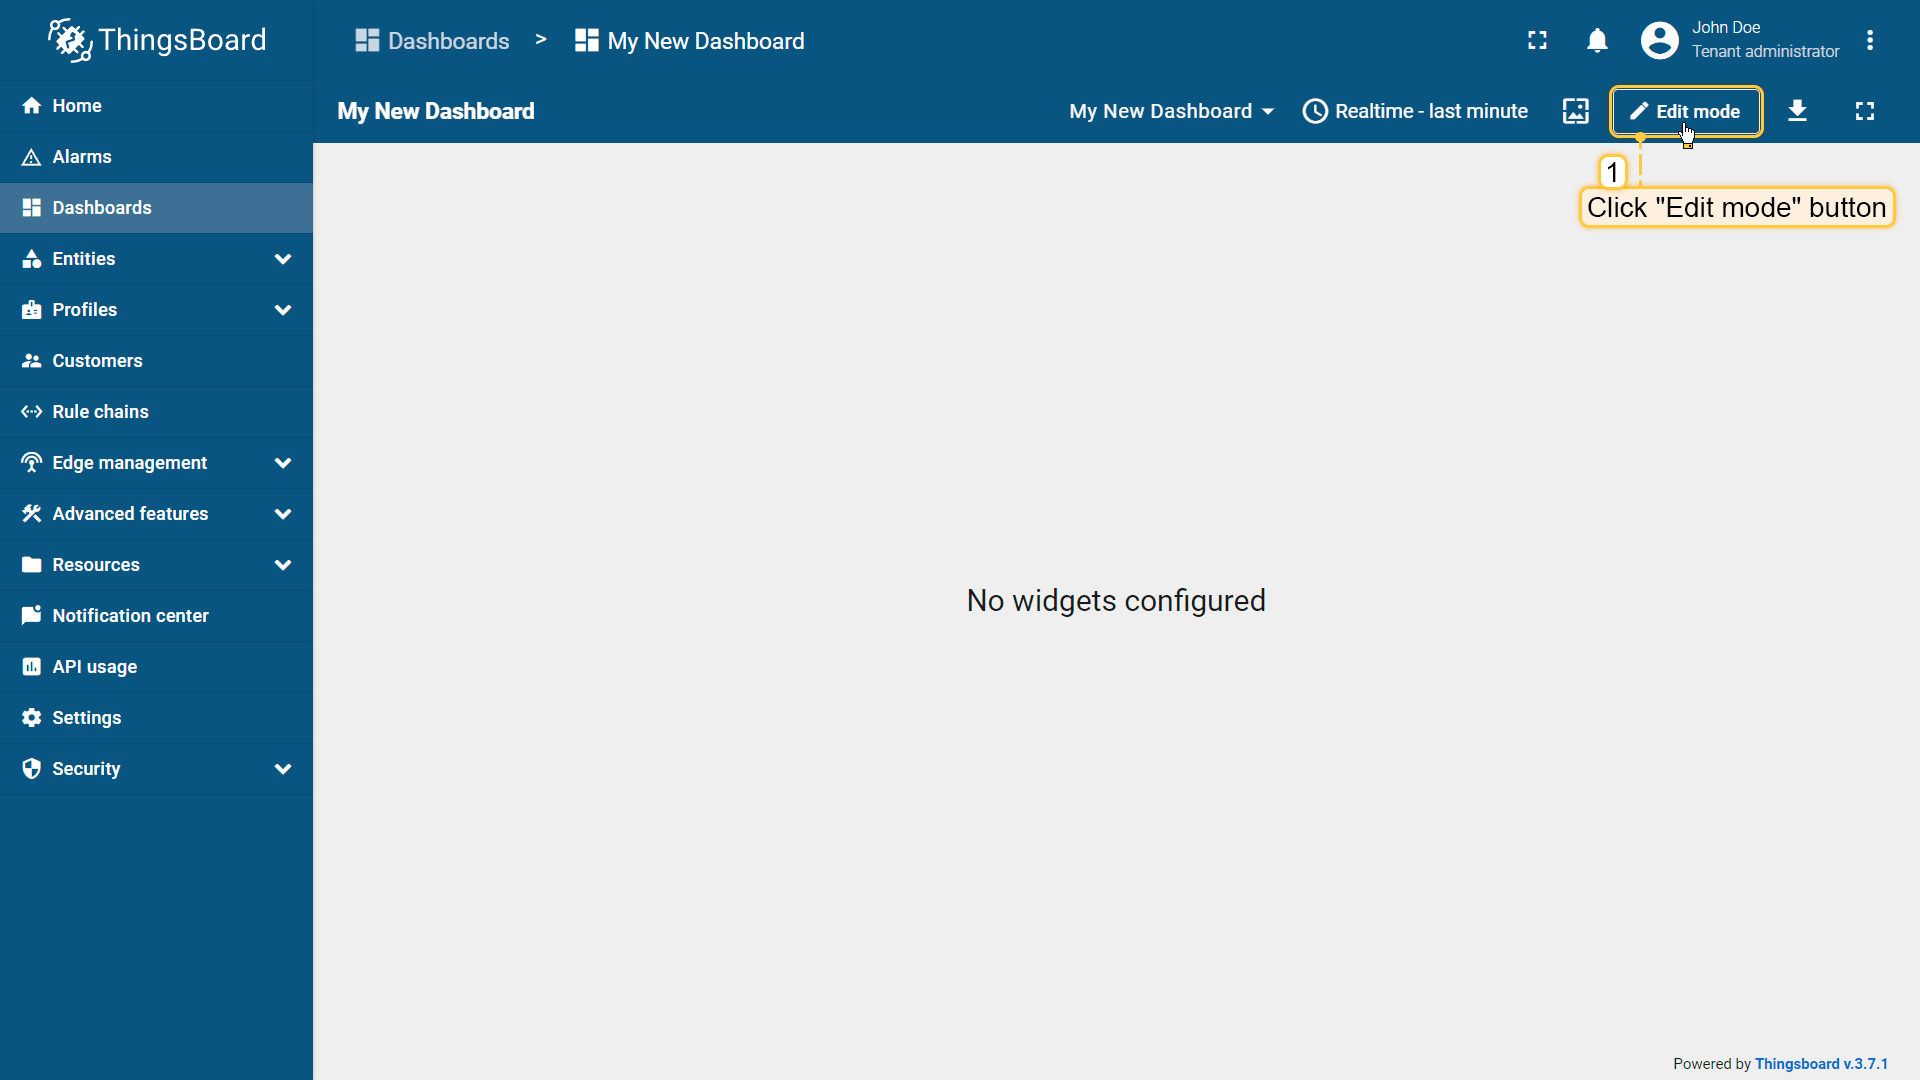
-
Find the
Chartswidget bundle and click on it.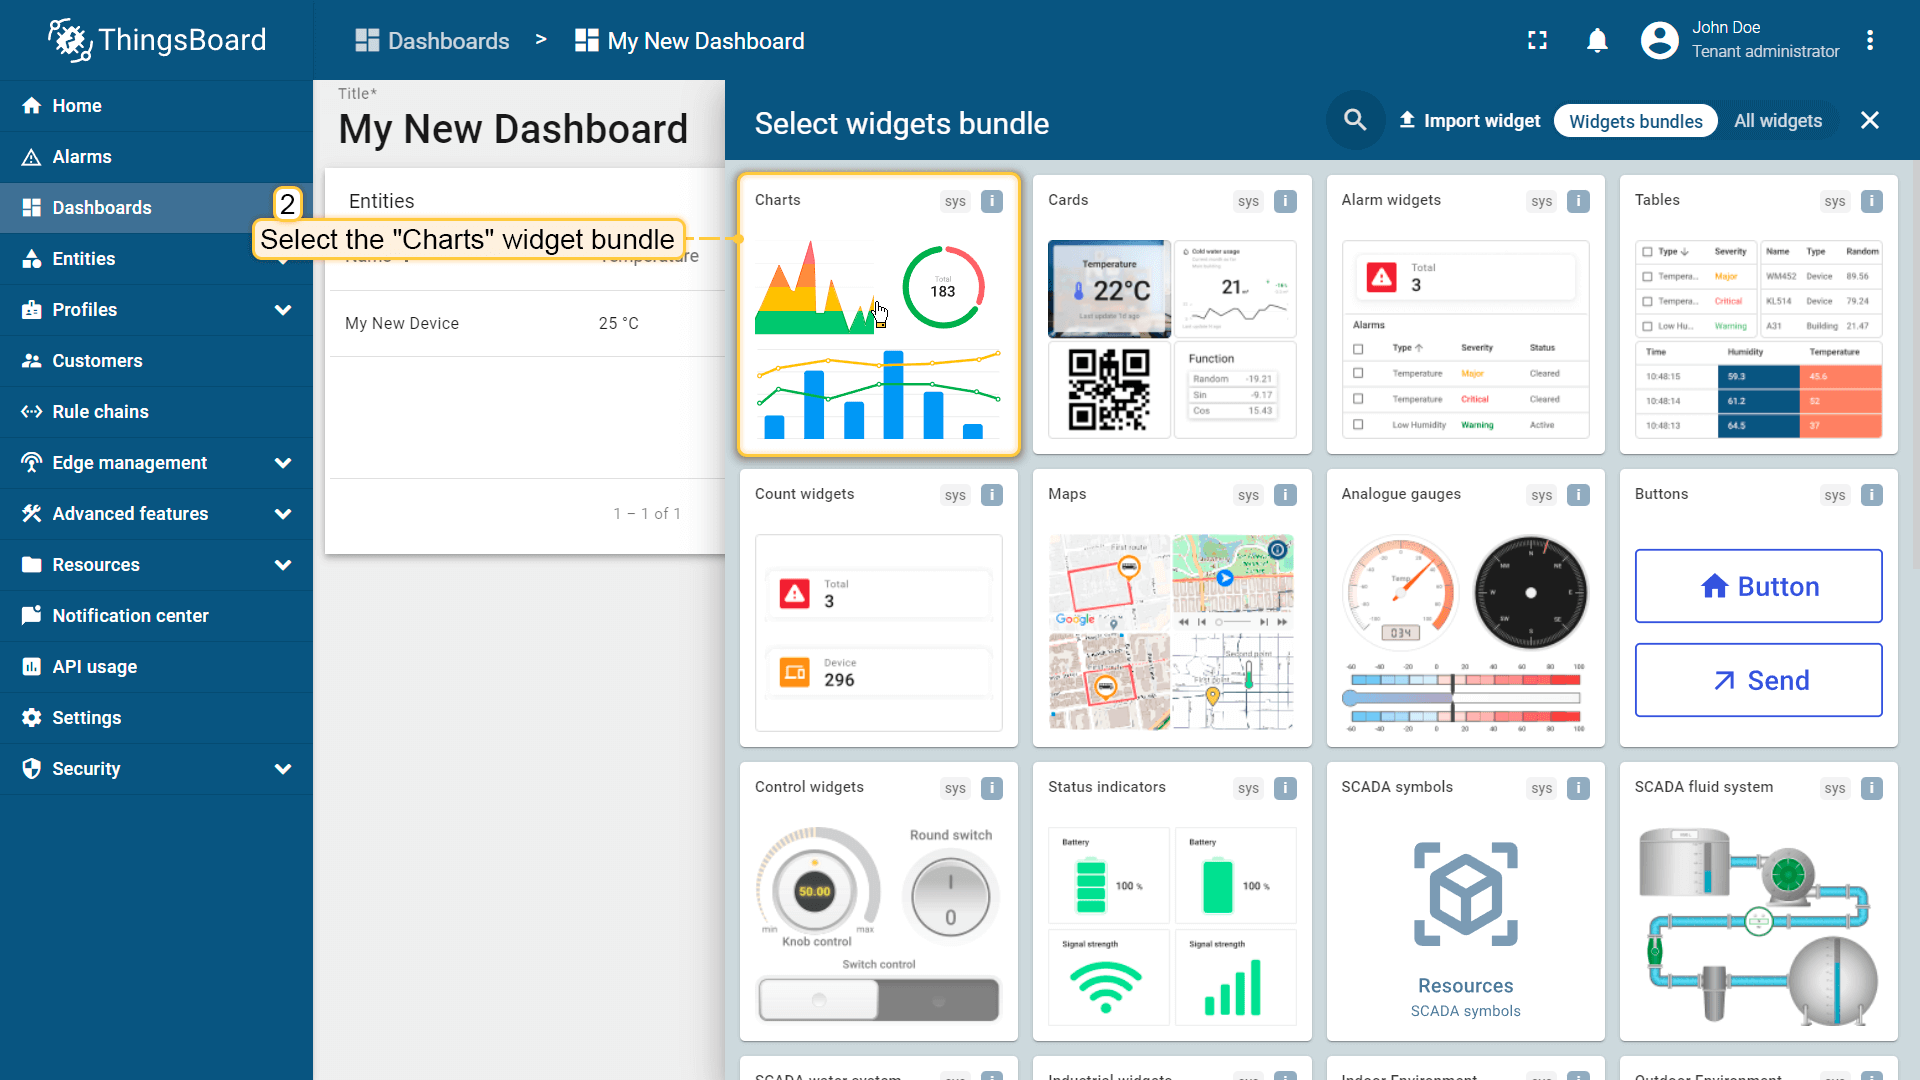
-
Select the
Time series chartwidget.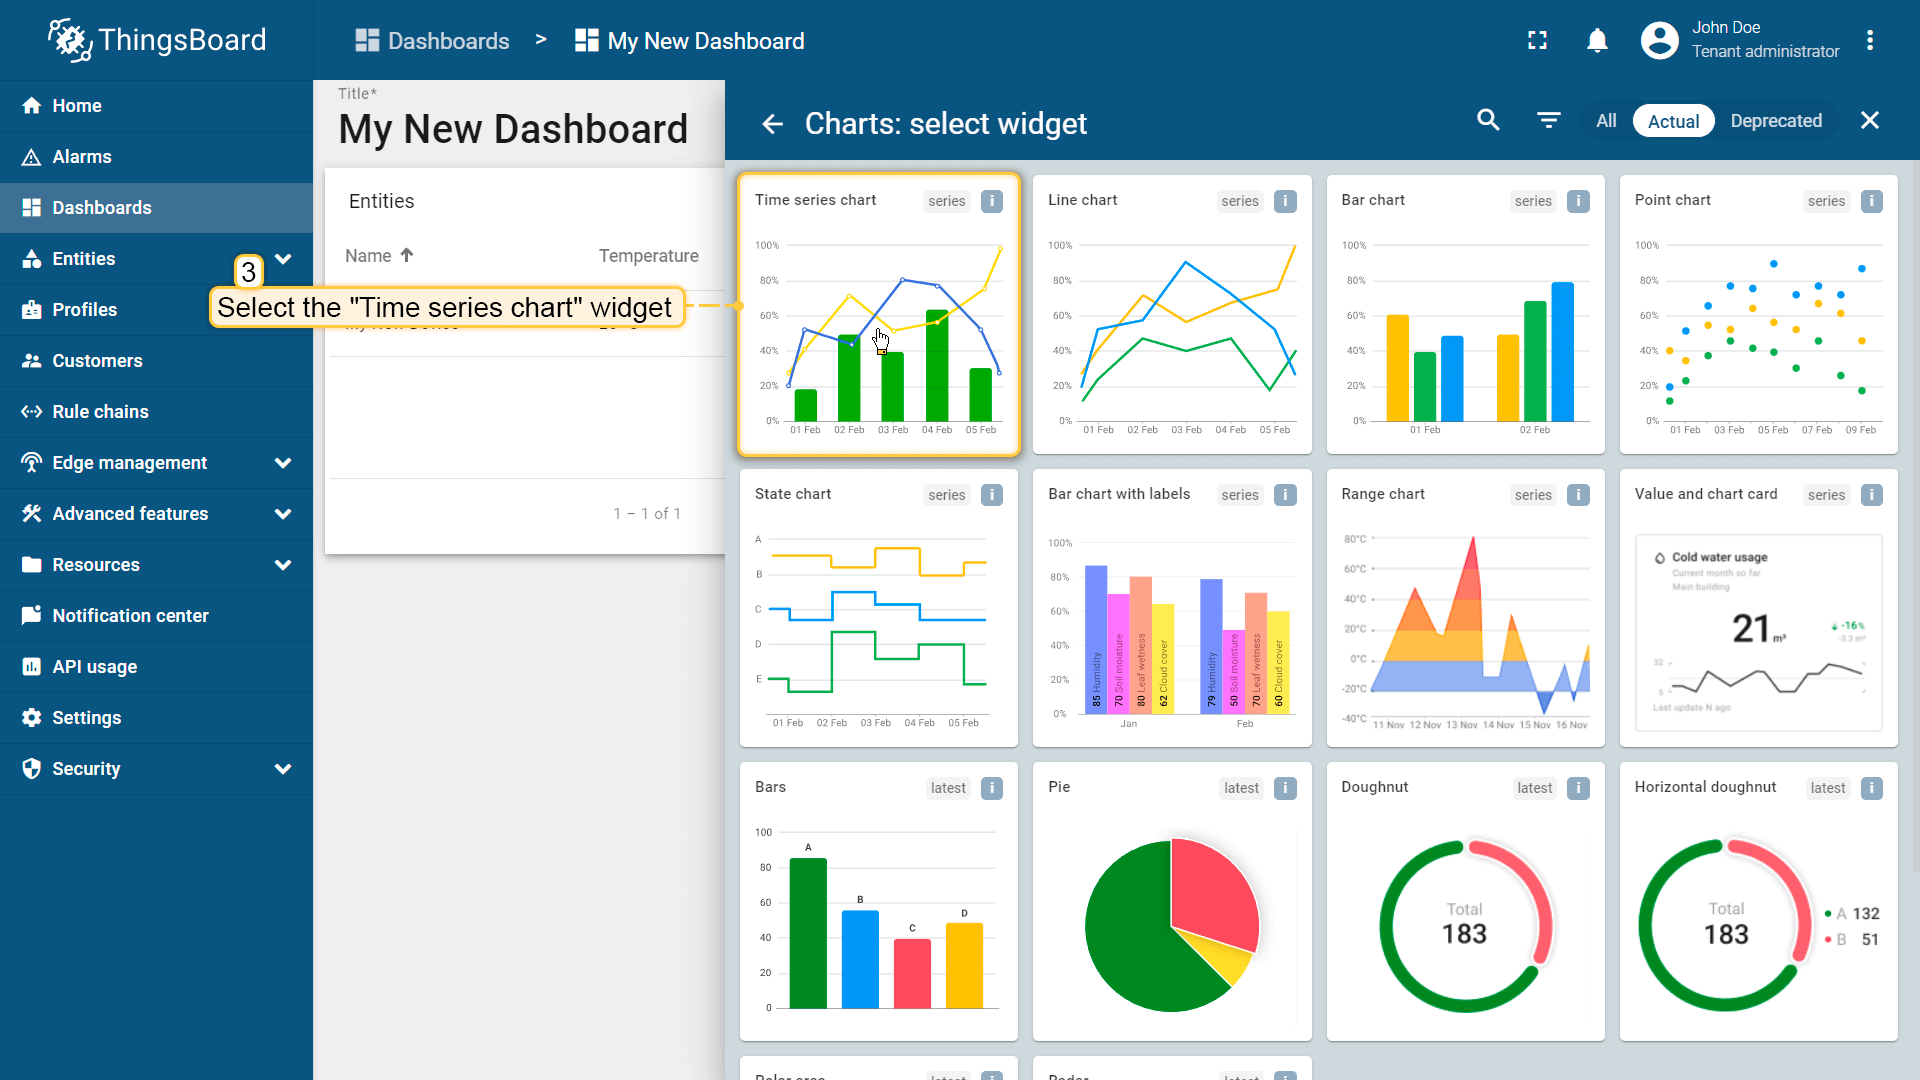
-
In the
Devicefield, specify the device you created earlier as the data source. -
In the
Seriessection, enter the data keyAvailable,Park,Improperto monitor the car park related values of a device.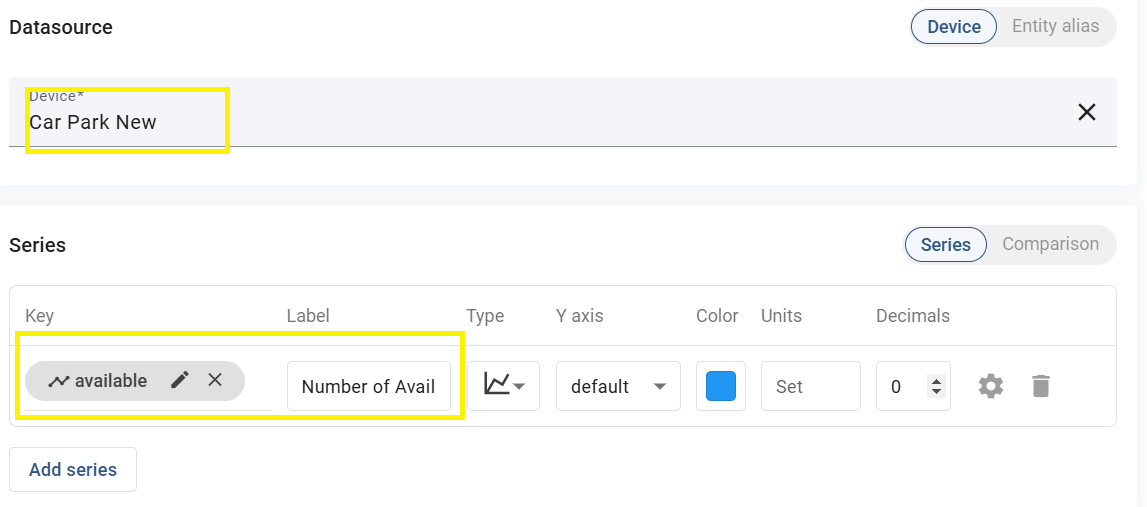
-
Resize the widget and apply the changes.
-
Click Add.
You can explore additional dashboard widgets in the system.
Demo